Page Folding
💡** What Is Page Folding?**
Unlike features such as Extend Note①|Basic Operations: Freely Open Up Note Space Between the Lines that "supplement" a document,
Page Foldingis a feature used to "hide" document content.Key features of Page Folding:
- Fold by table of contents: fold an entire section by chapter.
- Manual folding: fold just a small area of a page to make reading and excerpting more continuous.
- Flexible and reversible: expand at any time. Unlike deleting pages or Add or Delete Pages, Crop Paper, you can re-expand the hidden content whenever you like, which is more flexible and makes side-by-side comparison convenient at any time.
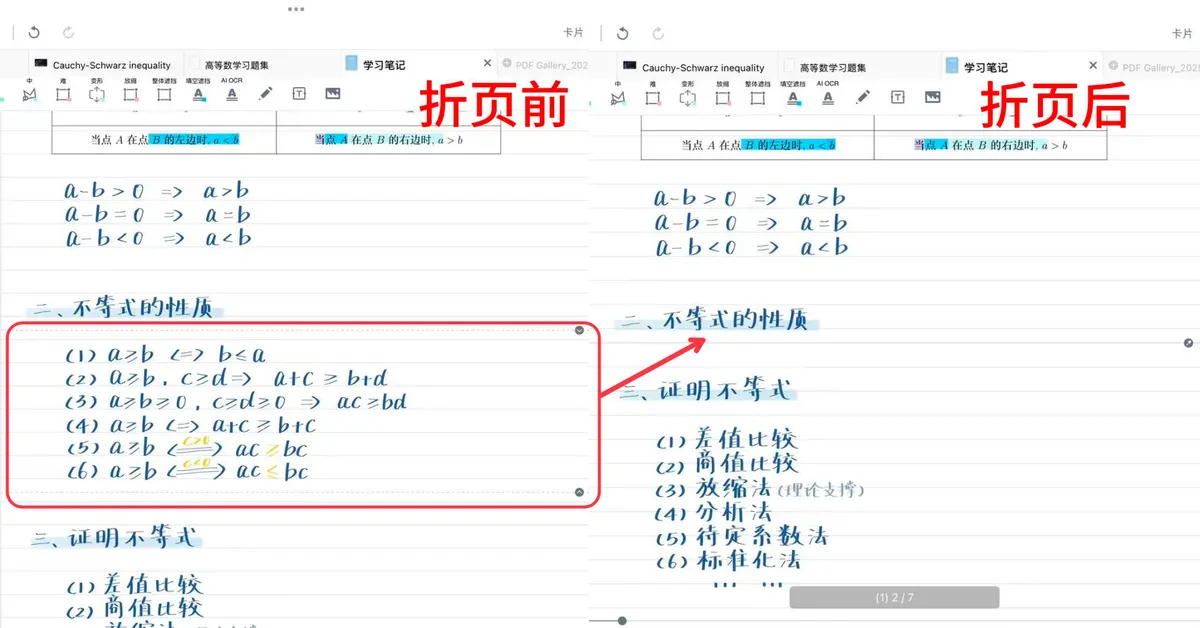
💡After folding, the folded content is excluded from excerpts. For example, after folding away a book's headers and footers, you can excerpt the body text smoothly across pages.
Excerpts made before folding are kept after folding.
1 Fold by Table of Contents
💡Example use cases:
When emphasizing, you can hide unimportant chapters to quickly distinguish the exam points.
When drilling practice problems, you can hide the answer chapters so you don't see the explanations while browsing, and expand them only when needed.
Page Finder
Table of Contents
Table of Contents - More
-
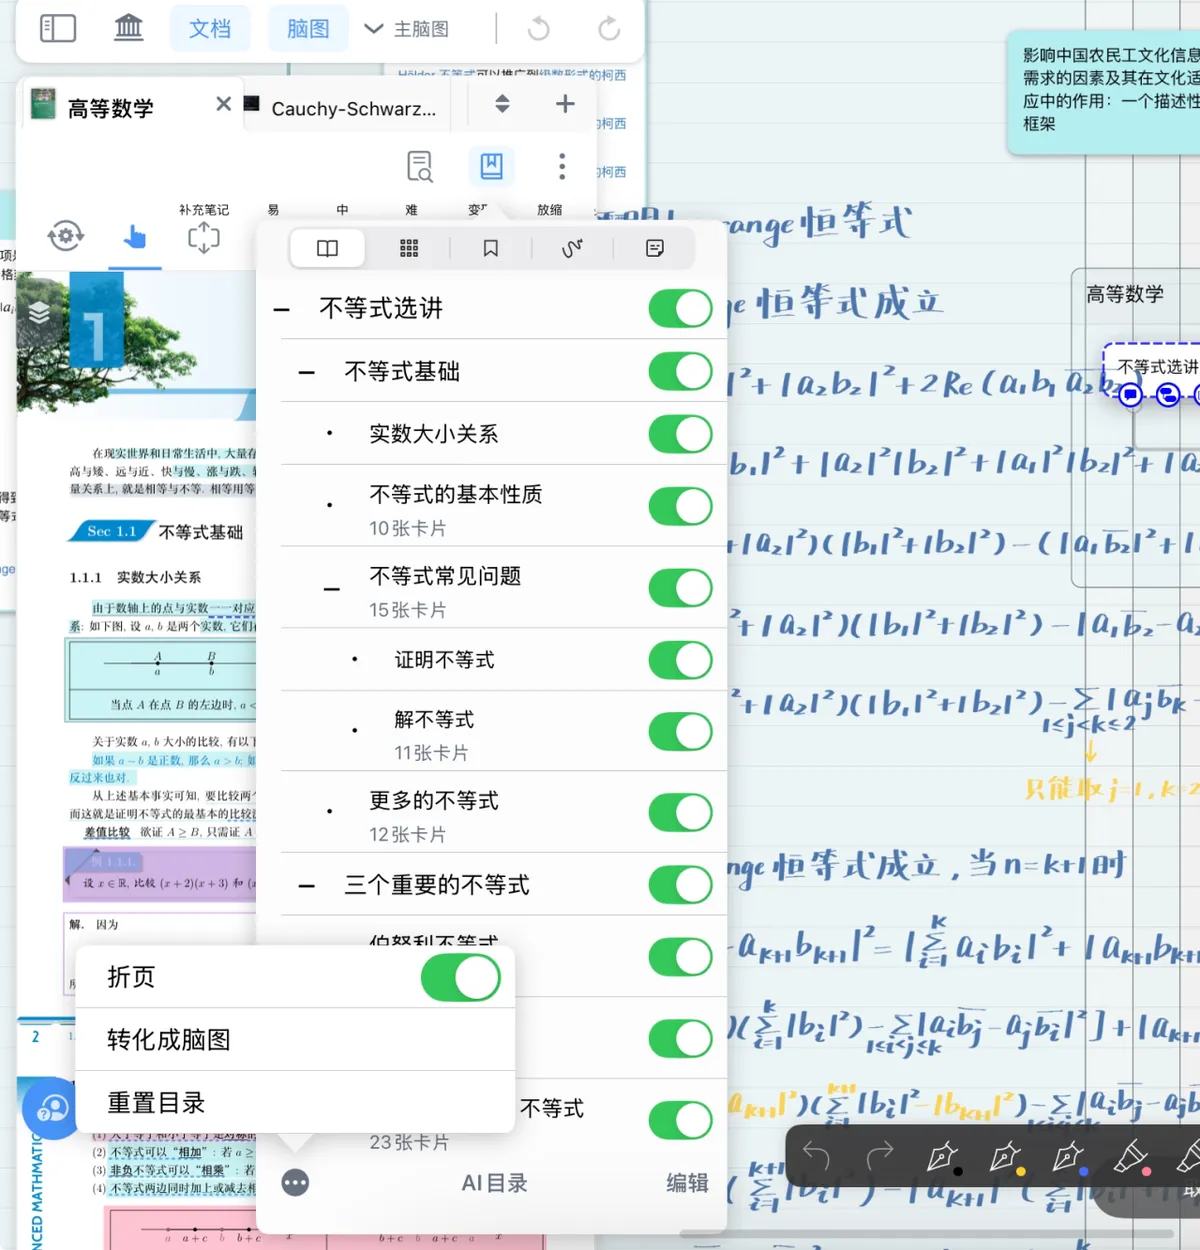
Tap the
Page Findericon → select theTable of Contentsicon- Tap "
More" in the bottom-left corner → turn on the "Fold" switch - Tap the switch next to a chapter to fold/show it
💡When you fold a higher-level entry in the table of contents, all of its sub-entries are folded automatically.
For example, when you fold "Chapter 3," all sub-sections such as "3.1" and "3.2" are folded too.
- Tap "
2 Manual Folding
2.1 Fold a Selection
💡Example use cases:
When you want to make a continuous excerpt of a passage but other text gets in the way (such as headers, footers, or citation marks in papers), you can manually fold away that content.
Fold the translation section, a formula derivation, or a detailed explanation of a concept, and expand it only when needed.
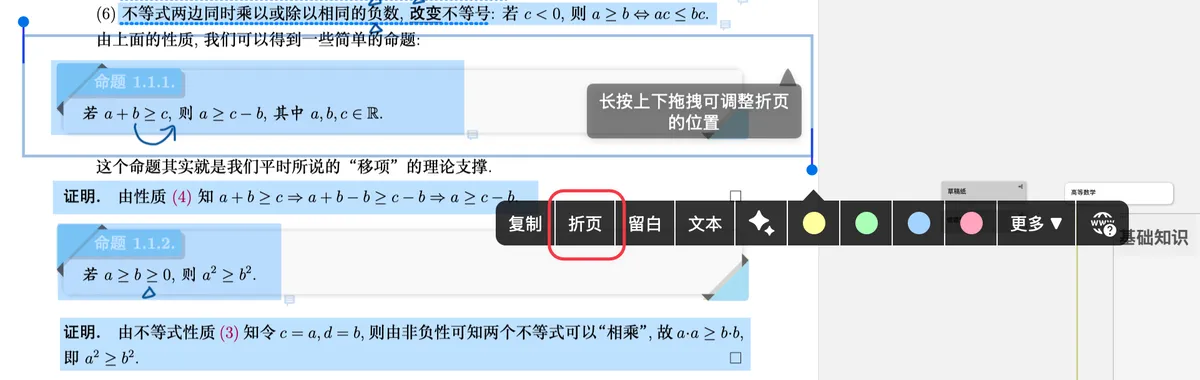
In the document, use the hand tool to select the area you want to fold, bring up the hand tool pop-up menu bar, and choose Fold from it to manually split and fold the document.
2.2 Split & Fold
💡Example use cases:
Quickly invoke the folding feature.
When you want to fold all document content after a certain point in bulk, but deleting page by page would be too much work, you can choose to fold away everything below.
The areas above and below the split form a comparison; you want a reading mode where the top stays fixed while the bottom scrolls.
- Press and hold any position on the document page until a
blue dotappears, then choose "Split & Fold" in the Hand Tool Pop-up Menu Bar and Its Customization.
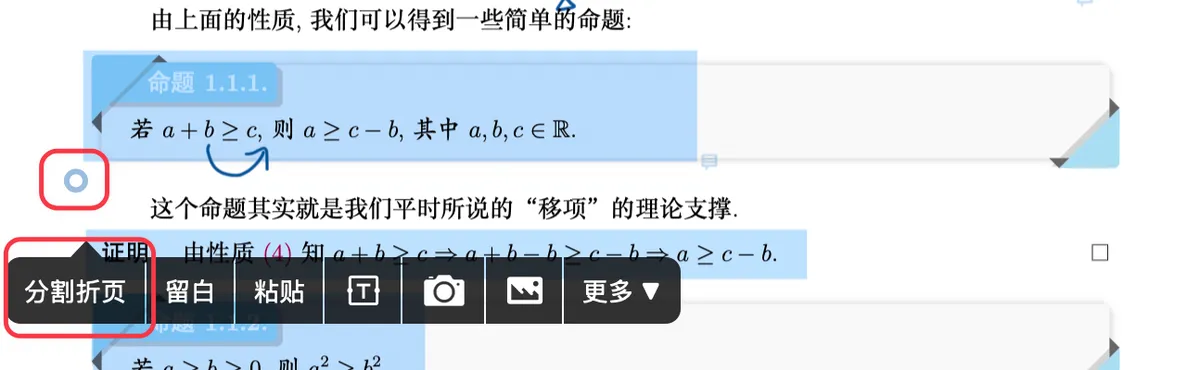
- A **
baseline** appears at the position of the blue dot (marked 1 in the figure). The pop-up above the baseline offers the Fold Above, Fold Middle, and Fold Below options.
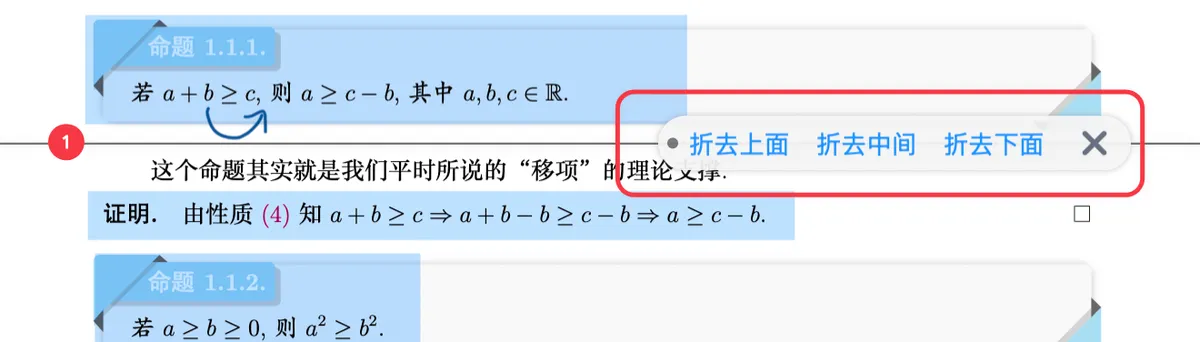
| Name | Action | Effect |
|---|---|---|

| Fold Above | Slide up and down to adjust the fold range; once set, tap "Fold Above" |
All pages above the document's baseline are folded. E.g.: 🖼️ image |

| Fold Middle | You must slide to set the upper and lower bounds of the fold range; once set, tap "Fold Middle" |
While sliding, the folded area is no longer shown. E.g.: 🖼️ image |

| Fold Below | Slide up and down to adjust the fold range; once set, tap "Fold Below" |
All pages below the document's baseline are folded. E.g.: 🖼️ image |
| × | Tap the icon | Cancel this fold operation |
2.3 Working with the Fold View
2.3.1 View Folded Content
Fold
- Folded content shrinks into a single line. Tap the
pushpin-shaped iconat the far right of the fold line (as shown above) to preview thefold view. - Tap the
xicon in thefold view, or tap outside the folded area, to exit the folded document-page display. - When the folded content is long, the display area is limited, so slide up and down to view the folded document pages.

💡While previewing folded document pages, you can also perform operations such as excerpting and inserting text boxes and images, but you cannot use split & fold or extend note.
2.3.2 Adjust the Fold
Expand Fold
- In the
fold view, tap theexpand-fold iconto show the folded content. - Press and hold the
adjust iconon the top or bottom edge until the dashed line turns blue. - Drag up and down to adjust the fold range.
-
Choose "
Fold" to fold the document again, or tap "Undo Fold" to undo the fold.Tap the expand icon to show the folded content.
Adjust Fold - Bottom
Adjust Fold - Top


2.3.3 Undo the Fold
Fully expand the folded content to restore the original pages.
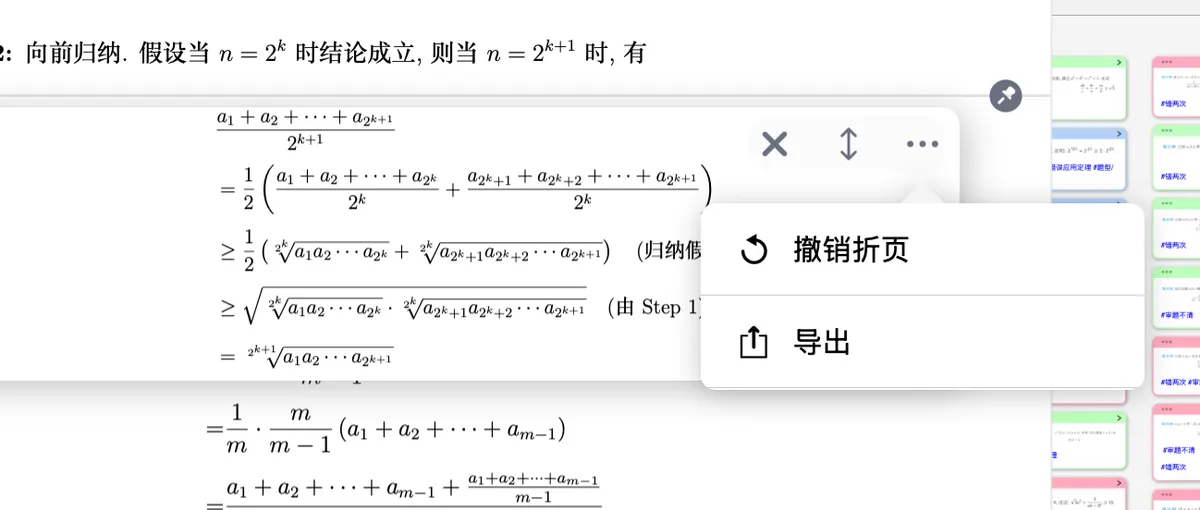
Undo Fold
Tap the More icon, and when the pop-up appears, tap the undo icon (as shown above) to undo the folding of the document page.
2.3.4 Export the Fold
Export Fold
Tap More → the Export icon → choose a format,
You can export the fold as a PDF or long image for easy sharing or printing.