Presentation Mode and Its Applications
💡When a learner wants to record their own actions to teach others, Presentation Mode displays finger taps as red-dot clicks and shows stylus taps as a virtual Apple Pencil model. With Presentation Mode, learners can demonstrate their steps to others more clearly.
1 Enabling Presentation Mode

- Open the sidebar on the home screen and tap the menu button
- Tap
Settings - Scroll down to find
Presentation ModeunderMixed; tap it, then restart MarginNote 4 to enable Presentation Mode.
2 Screen Casting
2.1 Local Screen Casting
MarginNote 3 supports connecting an external projector and casting to a large-screen display. This feature will arrive in a future MarginNote 4 update.
2.2 Online Screen Casting
On Mac, social and conferencing apps let you watch the demonstration through their built-in screen-casting feature. When a learner wants to live-stream the iPad's screen, the method below uses the iPad's screen content as the video feed; paired with Presentation Mode, it makes the learner's actions much clearer to broadcast.
2.2.1 Share Screen
Open the screen-sharing feature of any social or conferencing app. We'll use QQ as an example.
-
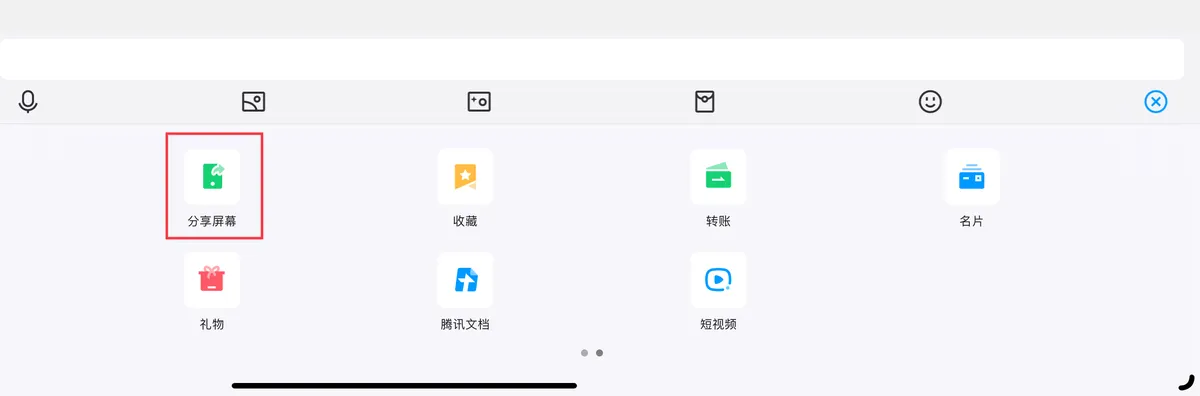
Find the ➕ button to the right of the chat box; tap it, then swipe the toolbar to the right to find "Share Screen"
-
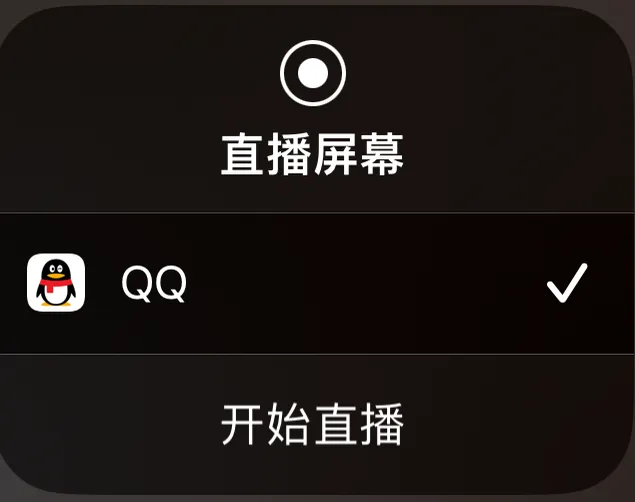
Tap to start the live stream.
💡Official guides for other common apps: Tencent Meeting, Feishu
3 Screen Recording
3.1 Mac
-
You can use QuickTime Player, which comes built into the Mac
- Open QuickTime Player
- You can find QuickTime Player in the "Applications" folder in Finder, or launch it with Spotlight search (press
Command+Spaceand type "QuickTime Player"). 2. Start recording - In QuickTime Player, choose "File" > "New Screen Recording" from the menu bar.
- Set recording options
- After you click the red record button in the screen-recording window, a prompt asks whether you want to record the entire screen or only a selected area.
- If you only want to record part of the screen, click
Drag to record a portion of the screen, then select the area you want to record.
- Start and stop recording
- Once you've set your recording area, click the
Start Recordingbutton. - When you're finished, end the recording by clicking the stop button in the menu bar at the top of the screen (a round stop icon), or by pressing
Command+Control+Esc.
3.2 iPad
-
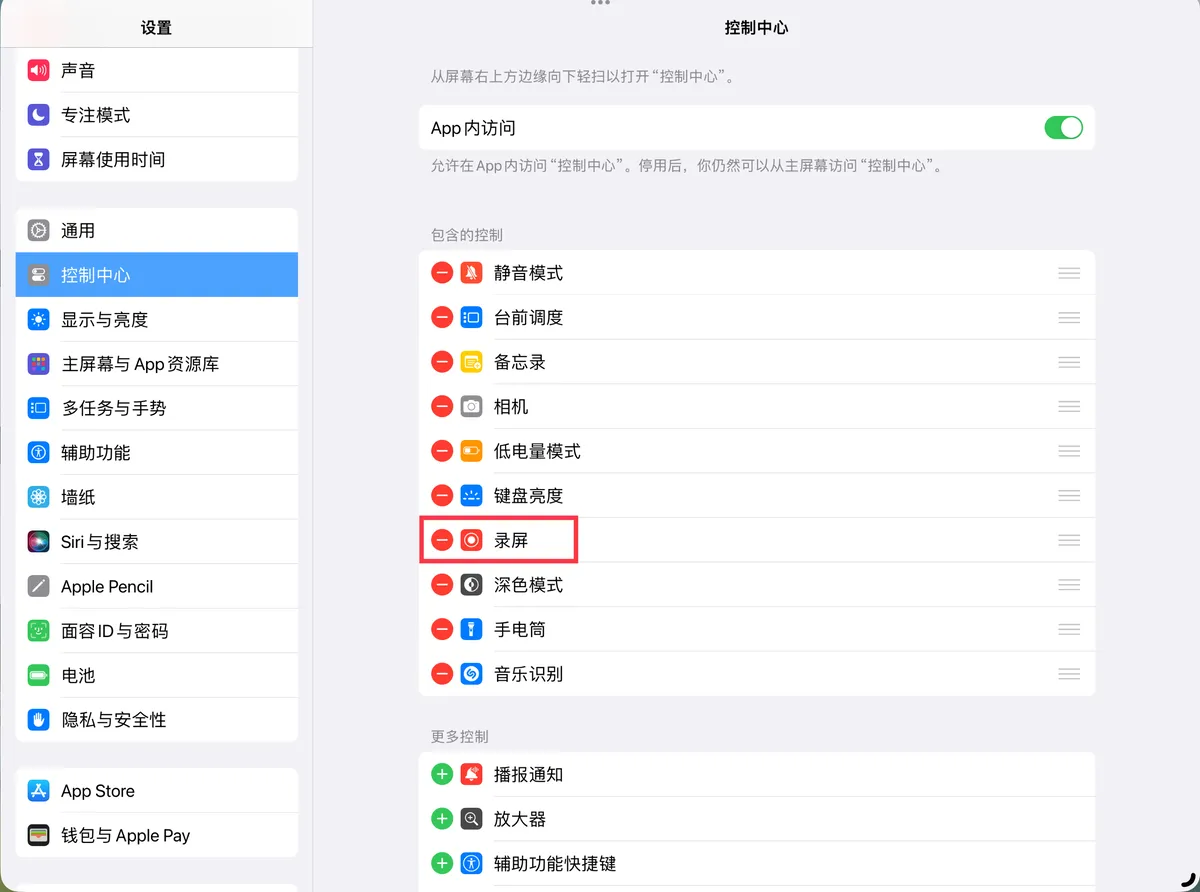
First, make sure Screen Recording has been added to the Control Center via Settings - Control Center on your iPad
-
Swipe down from the top-right corner of the screen to open the Control Center, then tap the screen-recording icon to start recording
💡Long-press the screen-recording icon to access settings, such as the microphone toggle

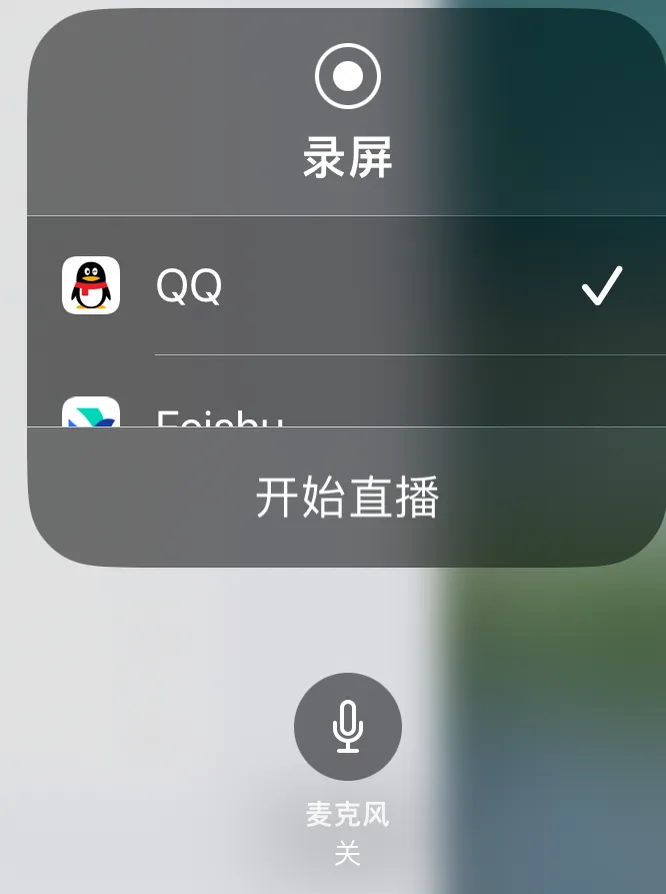
- End the recording: when you're finished, swipe down to open the Control Center and tap the screen-recording button again to stop recording.