
Outline Editing and Indentation
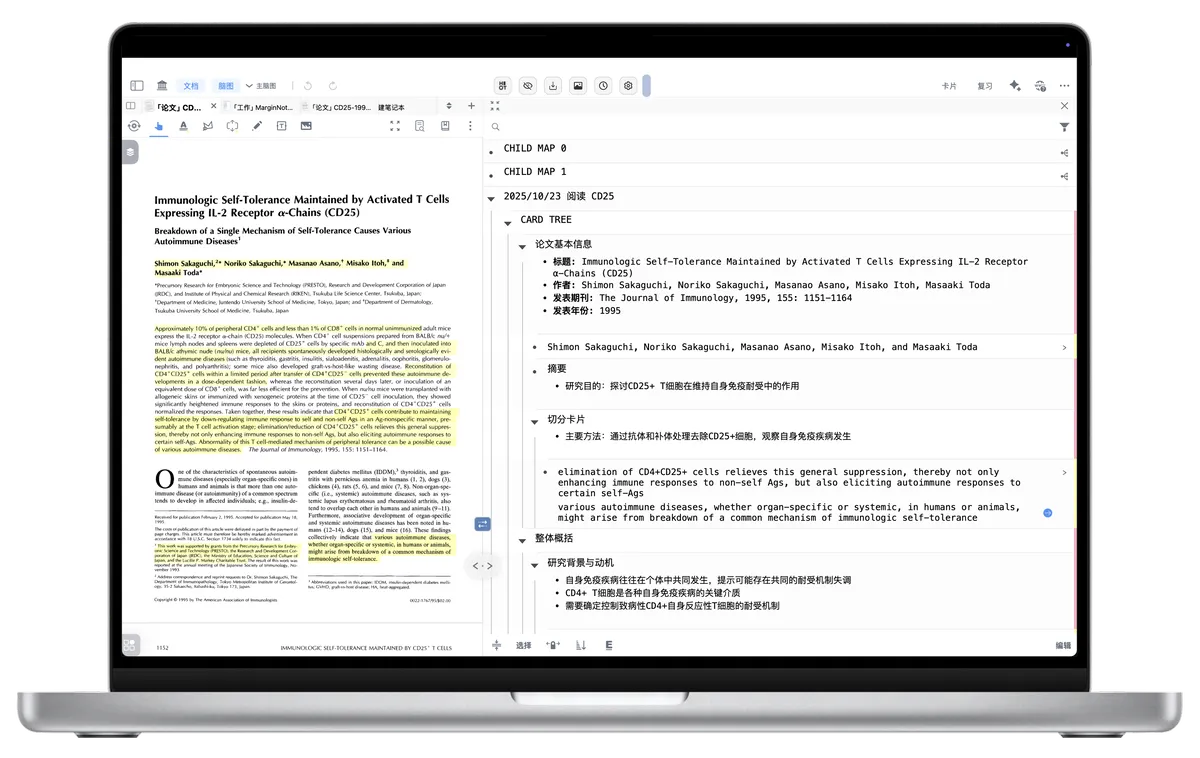
1 How to Create a New Node (Card)
💡In MarginNote 4, a "node" is essentially a "card". Any operation that adds a card to the mind map can be used to create a new outline node.
1.1 Entering the Outline Editing View
Before you start creating nodes, you first need to enter the outline editing view:
- Tap the mind map: In your study set, open the mind map view.
-
Tap the "Outline" button: In the right-hand toolbar of the mind map view, find and tap the
Outlinebutton (as shown by the icon below).Outline
-
Enter the outline editing view: Your mind map will now open the outline panel, showing the hierarchical structure of the cards.

1.2 Creating Nodes
1.2.1 Creating Nodes in the Document View
💡This is the most common way to create cards, and it is especially well suited to excerpting content from reading material.
- Make an excerpt card: Use MarginNote 4's excerpt tools (such as text or rectangle excerpts, etc.) to select the text or image you want to excerpt.
- Add to the mind map: Once you finish excerpting, the system automatically adds the excerpted content as a new card to the current study set's mind map, where it appears as a new node in the outline editing view.

1.2.2 Creating Nodes in the Outline Editing View
💡In the outline editing view, you can create and manage nodes more directly.
- Enter edit mode: In the bottom toolbar of the outline editing view, tap the
Editbutton. -

Create a node with the Enter key:
- Select any existing card and move the cursor to the end of the card;
- Press the
Enterkey. A new sibling node will then be created below the current card.
-

Create a node with the "Add a Card" button:
- In
Editmode, scroll to the bottom of the outline. - Tap the "Add a Card" button that appears at the bottom of the page to create a new sibling node at the end.
- In
1.2.3 Creating Nodes in the Mind Map View
💡In the regular mind map view, you can also create blank nodes, which will likewise appear in the outline editing view.

- Double-click an empty area: Double-click in an empty area of the mind map view to directly create a new mind map node.
-
Add via the single-click menu:
- Single-click in an empty area of the mind map view.
- In the pop-up menu, select the
New Cardoption to create a node.
Outline Indent Gesture: Drag to Adjust Levels
💡In the outline, MarginNote 4 brings learners a new feature—the Outline Indent Gesture. When enabled, it lets learners change a node's level and position by dragging it directly.
In addition, learners can also adjust the position of mind map nodes using keyboard shortcuts.
- Enter the outline editing page: Make sure you are in the outline editing view.
-
Enable the
Outline Indent Gesture: In the bottom toolbar of the outline editing view, tap theOutline Indent Gesturetoggle (as shown by the icon below).Outline Indent Gesture
-

Drag nodes directly:
- Adjust the level: Press and hold a node and drag it right to make it a child of the node above (indent); drag it left to reduce the indent and promote it a level.
- Adjust the order: Drag a node up or down to change its order among nodes at the same level.
3 Keyboard Shortcuts for Adjusting Outline Levels
💡Besides the drag gesture, you can use keyboard shortcuts to precisely control the level of outline nodes, which is especially efficient for quick edits.
- Enter the outline mind map editing page: Make sure you are in the outline editing view.
-
Enable "Outline Indent Gesture": In the bottom toolbar of the outline editing view, find and tap the
Outline Indent Gesturetoggle (as shown by the icon below).Outline Indent Gesture
-
Select a card and use a keyboard shortcut:
- Indent (become a child node): Select the card you want to adjust, then press the
Tabkey. The card will indent to the right and become a child of the nearest sibling card above it. - Outdent (promote a level): Select the card you want to adjust, then press
Shift + Tab. The card will move left and be promoted one level.
- Indent (become a child node): Select the card you want to adjust, then press the

💡Note: In edit mode, you can press the shortcut keys directly to adjust the outline level.
4 Splitting & Merging Nodes
💡In the
Outline, MarginNote 4 gives learners a brand-new way to split nodes: a keyboard shortcut that quickly splits a card's content into a new card.What is splitting nodes for?
- When a card's content is too long and contains several independent knowledge points, splitting the node breaks it into multiple, more focused cards.
- This helps you better organize and review individual knowledge points.
Shortcut: Enter
-
Open the outline editing view: First, tap the
Outlinebutton to enter the outline editing view.Outline
-
Tap the
Editbutton: Tap theEditbutton in the bottom-right corner to enter edit mode. -
Split a card's content:
- Move the cursor to where you want to split the card's content (for example, between two knowledge points).
- Press the
Enterkey. Everything after the cursor is automatically cut and turned into a new card, created as a sibling node of the current card.
-
Merge card content:
- Move the cursor to the beginning of the card (that is, the start of the card's content).
- Press the
Deletekey. The card's content is merged onto the end of the previous card.