Layers: Document Notebooks & Handwriting Layers
1 Understanding Layers: Document Notebook Layer vs Handwriting Layer
Core concept: think of layers like "tracing paper"
MarginNote's layer feature lets you stack multiple sheets of "transparent paper" on top of a single original PDF to take notes.
-
The first sheet of "tracing paper": the Document Notebook layer
Imagine you have a math textbook (the original PDF). For different study goals, you can lay down different sheets of "tracing paper":
- The first sheet, called "Class Notes," is where you excerpt key points and draw mind maps.
-
The second sheet, called "Mistake Review," is where you re-analyze the questions you got wrong.
These sheets of "tracing paper" are document notebooks. They are independent of one another, letting you keep several complete note systems based on the same book.
-
The second sheet of "tracing paper": the Handwriting layer
Now suppose you are working through problems on the "Class Notes" sheet of "tracing paper." You want to write in pencil on your first pass and correct in red pen on your second pass. At this point, you can stack an even thinner "transparent film" on top of this sheet to write on. These "transparent films" are handwriting layers. They do not affect your existing excerpts and extend notes; they only manage your handwriting strokes.
2 Document Notebooks and Related Settings
2.1 Creating a Document Notebook
When you want to keep notes separated by task (such as "Class Notes," "Mistake Review," and "Exam Sprint"),
in MarginNote a single textbook (the original PDF file) can spawn multiple document notebooks. Each document notebook is an independent, complete note version based on that PDF.
When to create one?
Create a new document notebook whenever you want to start a brand-new note workflow for the same source PDF. For example:
- During class, use the "Class Notes" notebook to record the teacher's explanations.
- When reviewing, use the "Exam Point Review" notebook to build a knowledge framework.
- Before the exam, use the "Quick Review" notebook to look at only the key points.
2.1.2 How to create one?
Document Notebook

Tap the Document Notebook button in the top-left of the document view (shown by the icon above), then tap the ➕ in the top-left to create a blank document notebook layer.
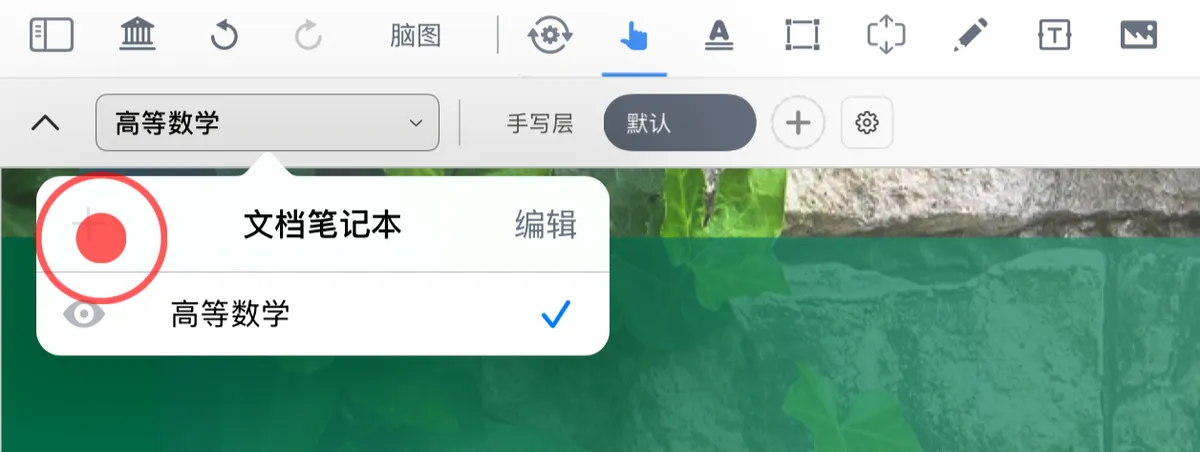
💡Note: To avoid creating empty, redundant notebooks, you cannot create another document notebook while the current one is blank.
2.2 Switching Between Document Notebooks
Tap the document notebook you want in order to switch to it.
2.3 Showing/Hiding Other Document Notebooks
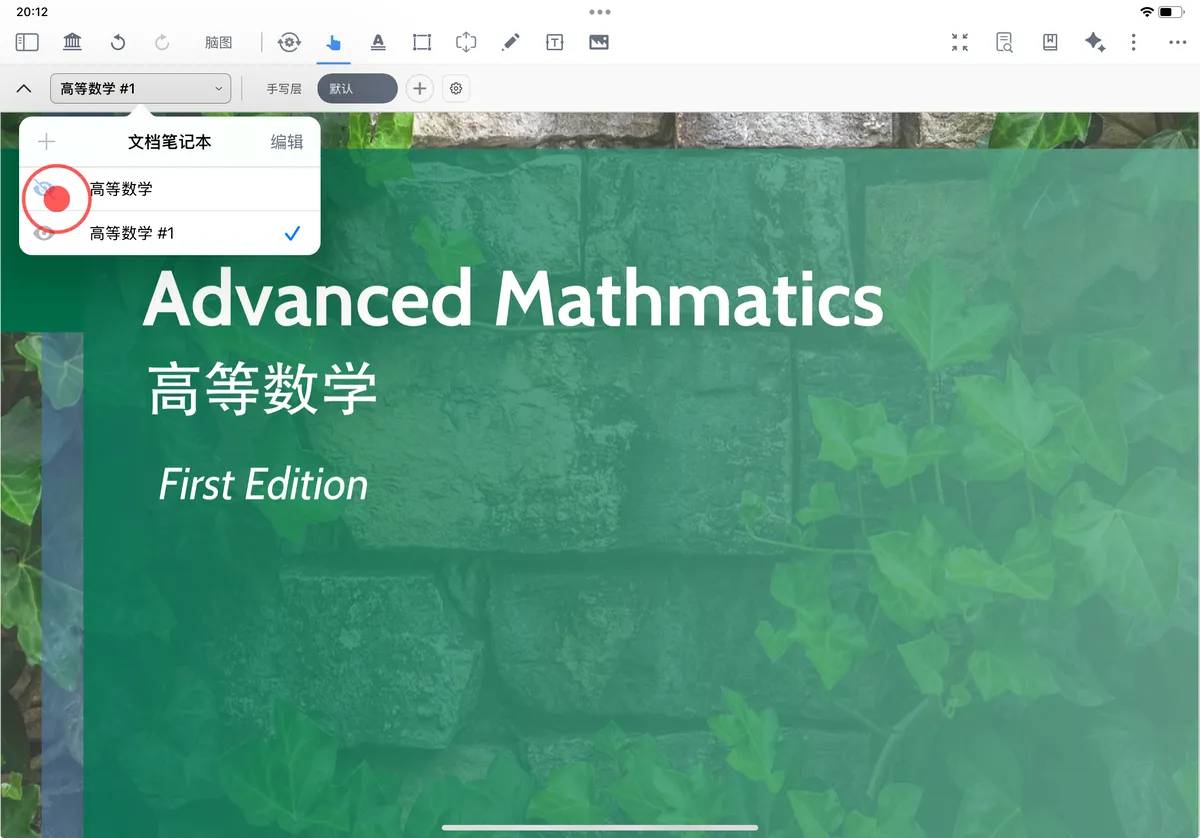
When you need to compare the contents of two notebooks, you can view them "stacked." While in the current notebook, turn on the "eye" icon in front of another notebook, and that notebook's content will appear in a semi-transparent, non-editable state.
💡Use case For example, while in the "Mistake Review" notebook, you can bring up the content of the "Class Notes" notebook for reference to see your original problem-solving approach, without switching notebooks.
⚠️When other document notebook layers are shown, extend notes cannot exist in embedded form.
2.4 Renaming a Document Notebook
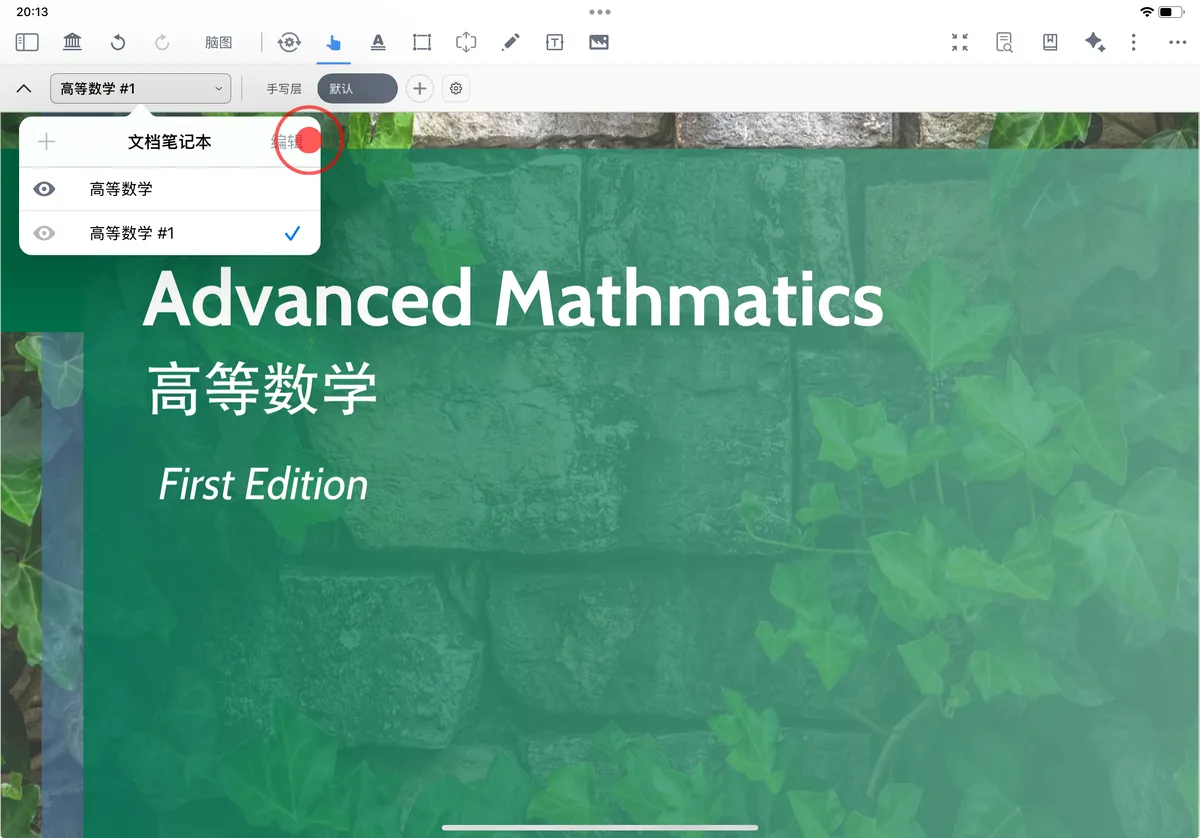
Tap the Edit button to rename a document notebook directly.
2.5 Deleting a Document Notebook
-
Tap
Edit, then tap theRemoveicon in front of the document notebook and chooseDeleteto delete that document notebook.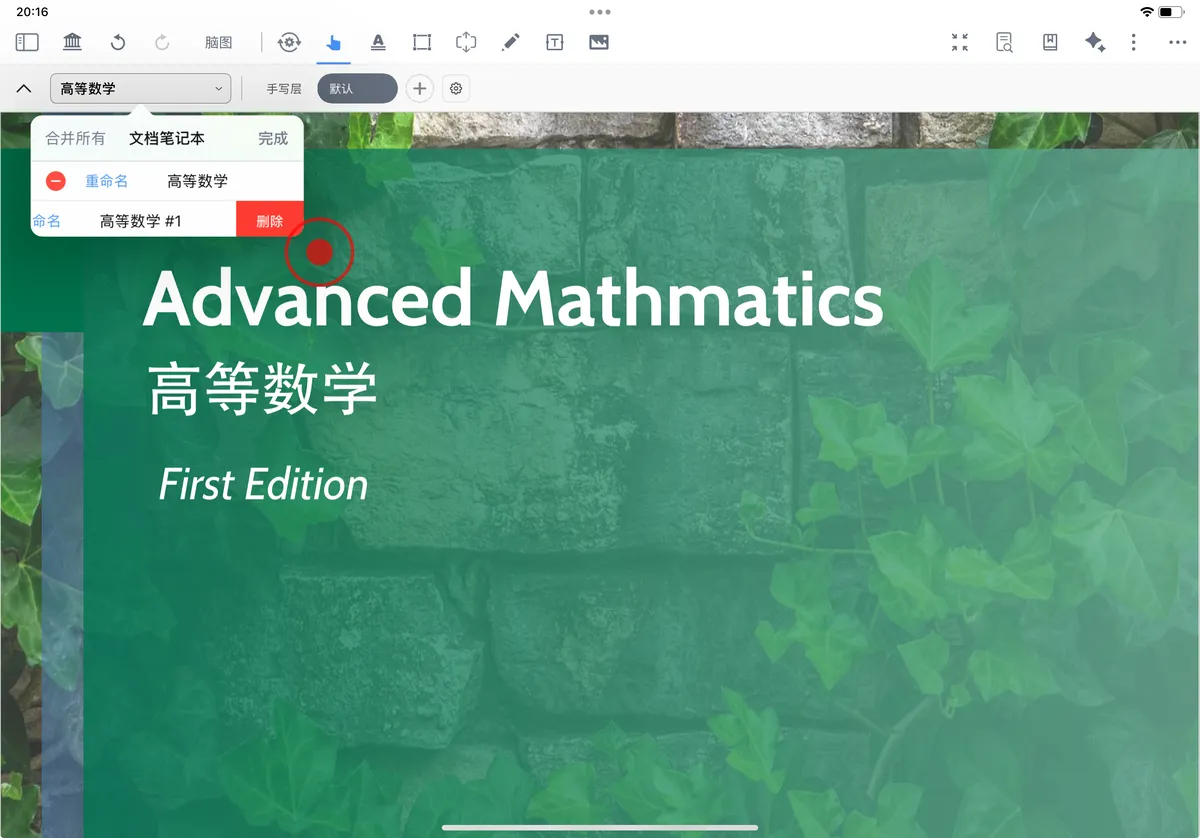
-
If you "delete" the document notebook you are currently in, the notebook still exists, but all notes inside it are cleared.
3 Handwriting Layers and Related Settings
MarginNote 4 adds a document handwriting layer feature that lets you create multiple blank handwriting layers for repeated practice while keeping your existing excerpts and extend notes. You can also overlay and merge different handwriting layers to review and summarize.
💡The core value of handwriting layers is repeated practice without damaging your original notes.
Typical scenario: You are working through practice problems in the "After-Class Practice" document notebook.
- First round: Create a layer named "Round1_0310" and complete it on your own.
- After checking answers: Create a layer named "Round2_0312" and correct your mistakes in red pen next to them.
- Pre-exam review: You can view these two layers separately or overlay them to clearly compare your mistakes against your corrections.
3.1 Creating/Switching Handwriting Layers
When you want to name layers by "round + date" (such as Calculus_Round1_0310) so you can later overlay them for comparison and merge them by stage, tap the handwriting icon (or double-tap it) to open the handwriting settings panel:
-
Choose "➕ New Handwriting Layer,"
-
Enter a new layer name to create a blank handwriting layer.

-
Enter an existing layer name to switch to that handwriting layer. (Or simply tap the layer name to switch.)

-
3.1.1 Default Handwriting Layer
If you have not created any handwriting layers, annotations made on the document with the handwriting tool are saved in the default handwriting layer.
⚠️The default handwriting layer cannot be deleted.
3.2 Operations for Multiple Document Handwriting Layers

Open the Document Handwriting Settings screen, tap Overlay Layer, and check the target handwriting layer; the target handwriting layer is then displayed together with the current handwriting layer.
At this point the opacity of the target handwriting layer is lowered (the opacity of its extend notes, text boxes, and images is lowered too), and it appears in a semi-transparent state—for reference only and non-editable—and is hidden in recall mode.
3.2.1 Overlay Layer
- Tap Overlay Layer and choose "None" to turn off the overlay display.
-
Tap Overlay Layer and choose the layer you want to overlay:
-
The overlaid handwriting layer appears on the current layer in a semi-transparent form and is non-editable.

-
Annotations on an overlaid handwriting layer are hidden in recall mode; turning on recall mode automatically hides the overlay layer, reducing distracting hints and strengthening active recall.
-
💡You can overlay only one handwriting layer at a time.
3.2.2 Binding Text Boxes and Images to a Layer

Inserted text boxes and images can be set to display on all handwriting layers, or bound to one specific handwriting layer.
-
Not bound:
Text boxes and images display on all handwriting layers. (Good for shared reference material and common notes.)
-
Bound:
Text boxes and images display only on the bound handwriting layer. (Good for round-specific material, such as first-round ideas or second-round corrections.)

💡The
Bind Text Box and Image to Layerswitch appears only when a text box exists.
3.2.3 Editing Handwriting Layers
In the handwriting settings panel, tap the edit button in the top-right, then tap the "..." icon to the right of a handwriting layer.
-
Delete a handwriting layer:
Tap
Deleteto delete that handwriting layer.
💡After you choose to delete, the handwriting and bound text boxes inside the layer will disappear, and the action cannot be undone, so proceed with caution.
-
Rename or merge a handwriting layer:
Tap
Rename or Merge, and a name-editing popup appears:-
Rename a handwriting layer:
Enter a name identical to an existing layer → performs a merge

-
Merge a handwriting layer:
Enter a name different from an existing layer → performs a rename

-
4 FAQ
-
What is the difference between a document notebook and a handwriting layer?
A: Document notebooks divide your workspace by task; handwriting layers record and review by round within the same workspace.
Document Notebook Handwriting Layer Definition An independent, complete note version created from the same original PDF; each document notebook can independently perform all note operations such as excerpting, annotating, cards, and mind maps A blank handwriting layer added within the same document notebook, only for handwriting strokes, while keeping all existing content such as excerpts and extend notes Effect after creating Returns to the un-annotated original PDF; all notes are reset Keeps existing excerpts and extend notes; only adds a blank handwriting layer Relationship between notebooks/layers Document notebooks are completely independent and do not interfere with one another Only handwriting strokes are layered; existing excerpts and extend notes are retained Use cases Multi-round review; managing multiple note versions Practice problems, drafts, handwritten marking, temporary handwriting notes -
When should I create a new notebook, and when should I just create a new layer?
A: Use a new notebook for different tasks (such as Class Notes vs. Mistake Review); use a new layer for multiple rounds of practice on the same task (round 1 vs. round 2).
-
Why can I see the overlay layer but not edit it?
A: The overlay layer is for reference and comparison, so it is shown semi-transparent and read-only; to make changes, switch to the corresponding handwriting layer.
-
What happens when I delete a handwriting layer?
A: It deletes the handwriting and bound content in that layer, and this cannot be undone. We recommend merging or backing up before deleting.
-
Why don't I see the "Bind Text Box and Image to Layer" option?
A: You must insert a text box or image first; only then will the binding switch appear.