Importing Documents and Document Management
💡On this page you will learn: the complete workflow for "importing files and organizing them by category" in MarginNote 4.
Ideal for first-time users—just follow the steps to get started.
1 Getting to Know the Document Library
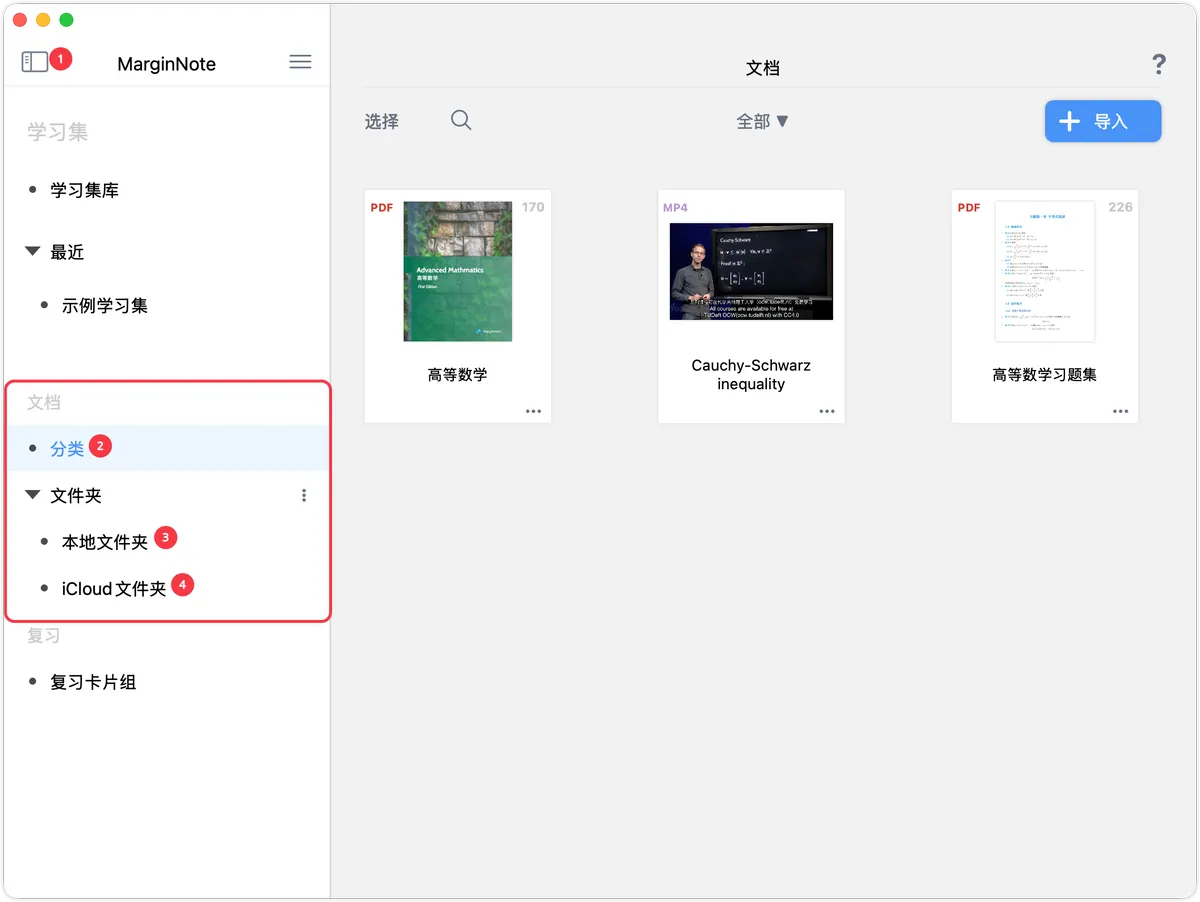
- Entry point: in the left sidebar of the home screen, tap
CategoryorFolderunder theDocumentssection. -
Basic structure:
Category: tag-style grouping that supports multi-level tags (use indentation to create sub-categories).-
Folder: like the directory structure on a computer, good for organizing by project or semester.💡By default you have an
iCloud Folderand aLocal Folder. Max users can also use the Add USB Storage Document Library feature to mount an external folder.
2 Importing Documents
MarginNote 4 supports PDF, EPUB, MOV, MP3, MP4, M4V, and M4A files, and can also save Bilibili and YouTube videos as well as web pages into the app.
-
Supported formats:
- Documents: PDF, EPUB
- Audio/video: MOV, MP3, MP4, M4V, M4A
-
Files convertible to PDF: Office documents such as Word, PPT, and Excel
💡For non-PDF files such as Word and PPT, MN converts them to PDF before importing. If the conversion result is poor, we recommend using a more professional document-editing app (WPS, Office) to convert them to PDF first and then import.
2.1 Importing from Outside the App (Open from Another App)
💡For documents that need cloud sync, we recommend saving them directly into iCloud's MarginNote4 folder (Document: Import to iCloud Folder by default1 / Sync Documents while Sync StudySets2).
-
iPad: in a cloud-drive or chat app, choose "Open in another app" → select MarginNote 4 to import.
💡Because Baidu NetDisk cannot correctly download and then open files within the iOS/iPadOS Files app, we do not recommend importing directly via "Files app → Baidu NetDisk".
-
Mac: right-click a supported file and choose "Open With" → select MarginNote 4 to complete the import.
2.2 Importing from Within the App
2.2.1 The "Import" Button in the Top-Right of the Document Management Page
Tap ➕Import on the document management page; you can choose to import From Files or From Web (add web pages, save YouTube and Bilibili videos locally).
-
Import From Files
Tap
➕Import-From Fileson the document management page to select the files you want to import in the Files app (you can multi-select and import many files at once).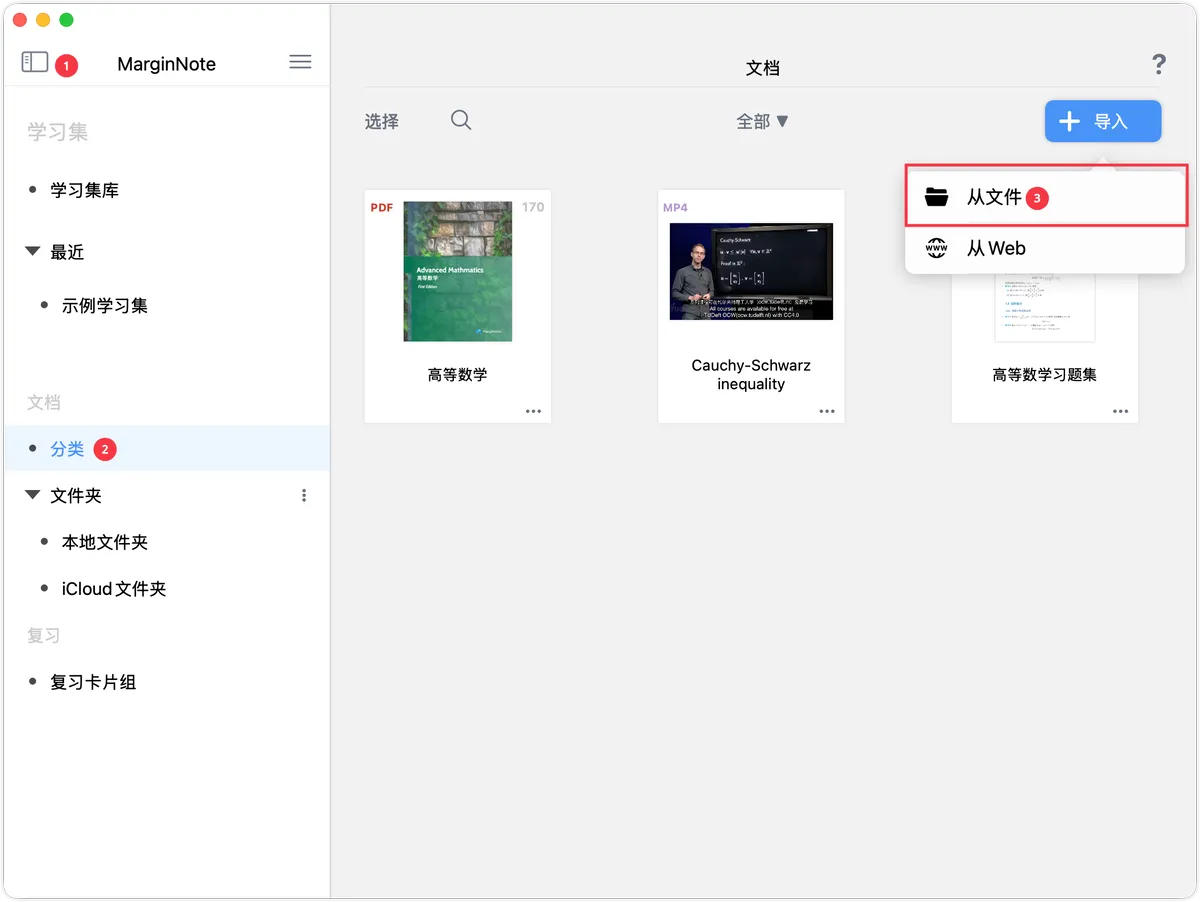
-
Import From Web
Tap
➕Import-From Webon the document management page. Once the page opens, search the page or paste a URL, or search on a video site (Bilibili and YouTube are supported), then tap the download button to save the web page or online video to your local document library.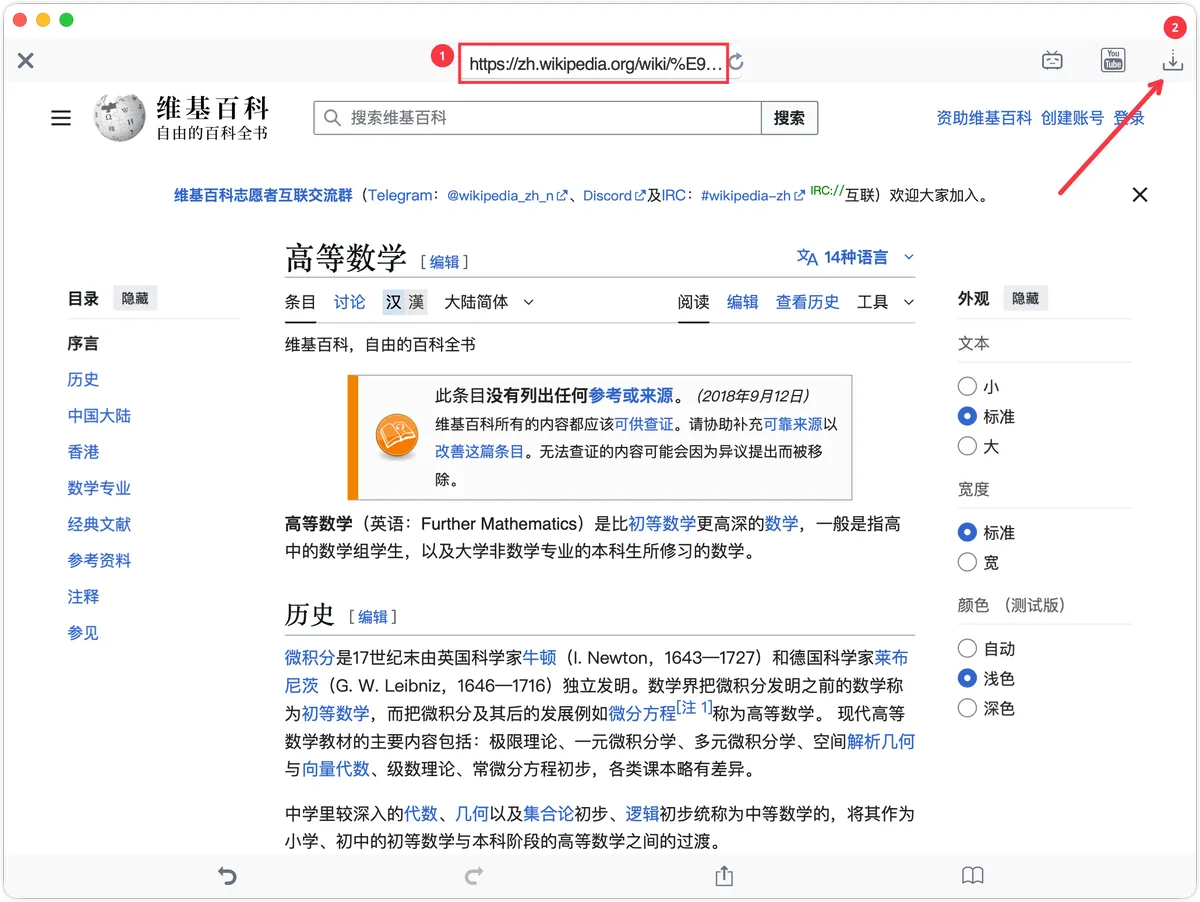
💡Log in to your account before importing from Bilibili and YouTube to ensure the quality of the imported videos.
Adding Documents from a PC/Mac via a WiFi Link (iOS devices only)
-
Tap
➕Import-Upload Documents from PC/Mac via WiFion the document management page.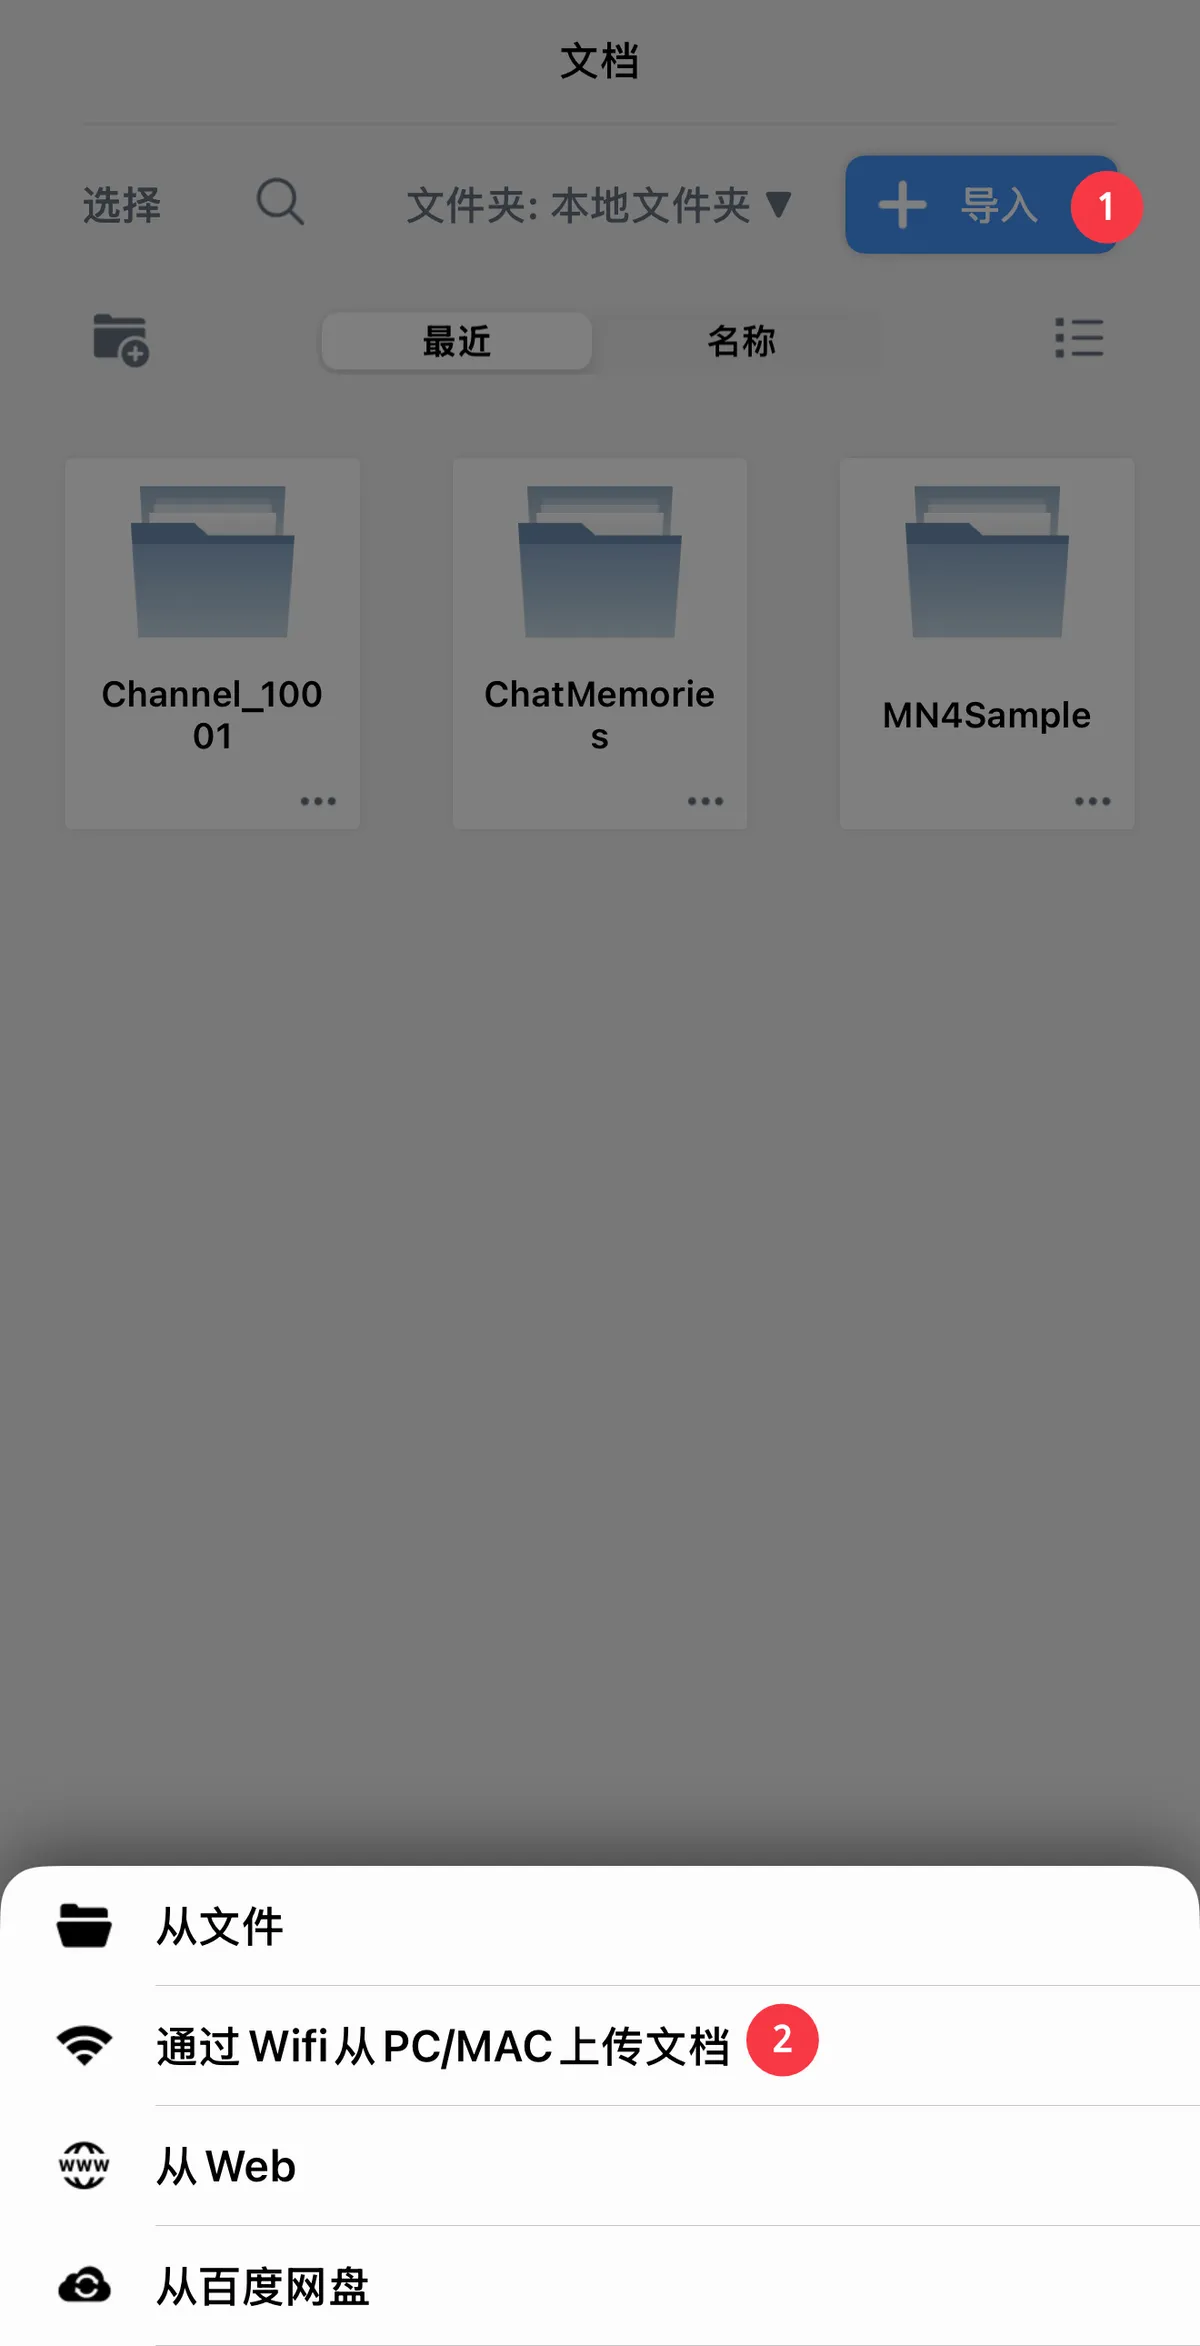
-
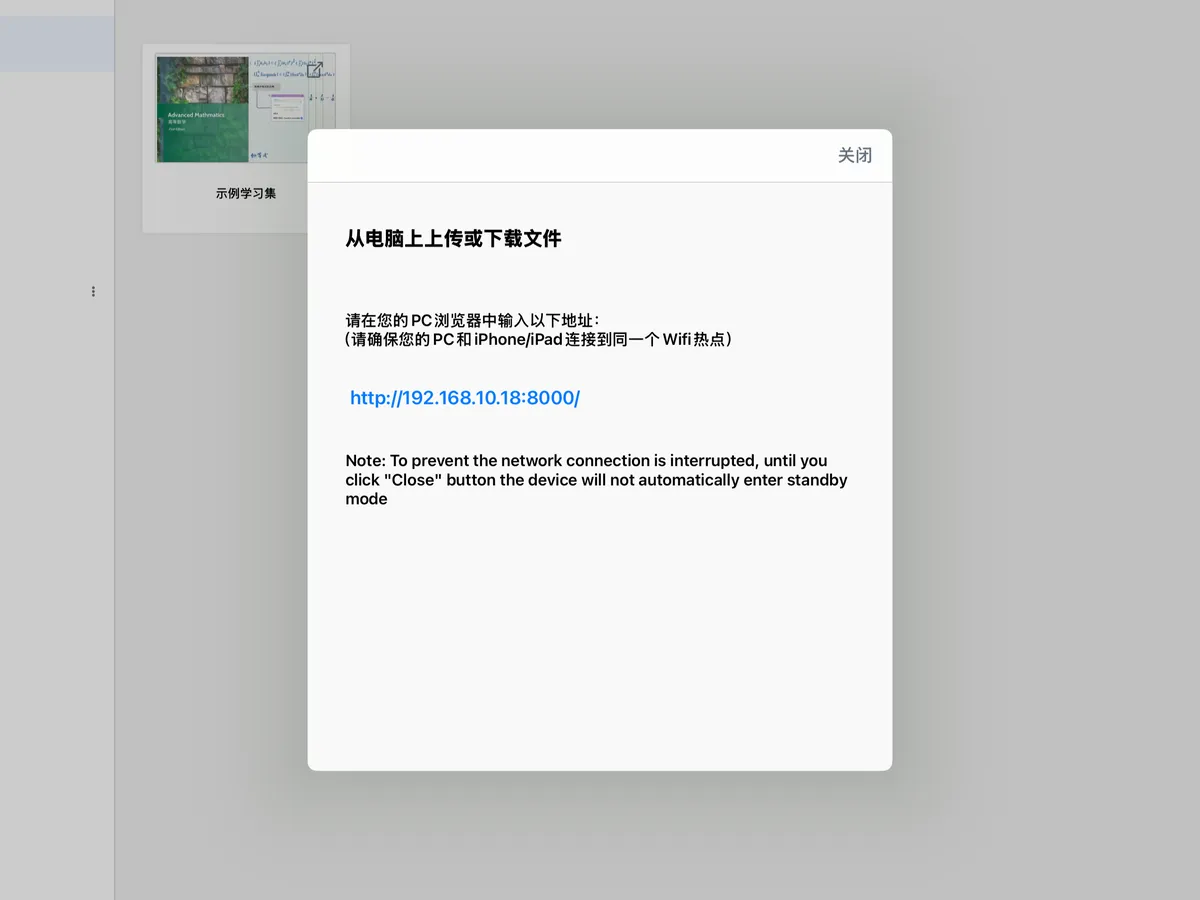
A pop-up will show a link; enter and open this link in your computer's browser (the iOS device and the PC/Mac must be on the same local network).
-
Tap **
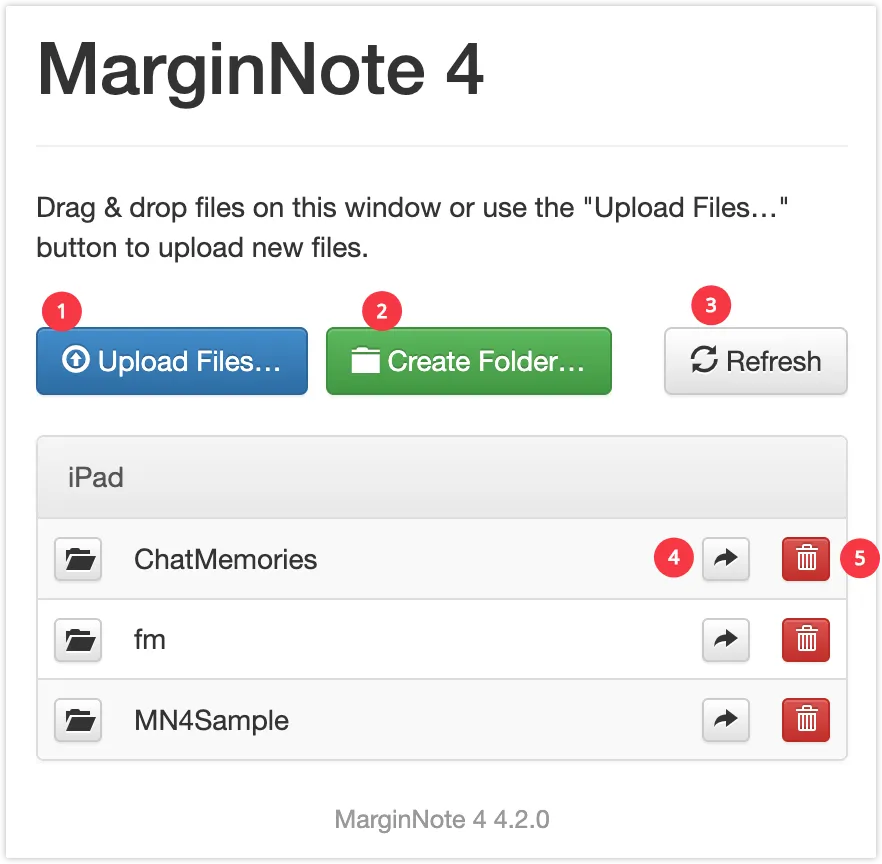
Upload Files** to select documents on your PC and upload them to your iOS device.1
Upload Files: Upload documents2
Create Folder: Create a folder within the app3
Refresh: Refresh the display4 Enter the folder
5 Delete
2.2.3 Importing from Baidu NetDisk
-
Tap
➕Import-From Baidu NetDiskon the document management page to import files directly from Baidu NetDisk. See the beginning of this chapter for supported formats.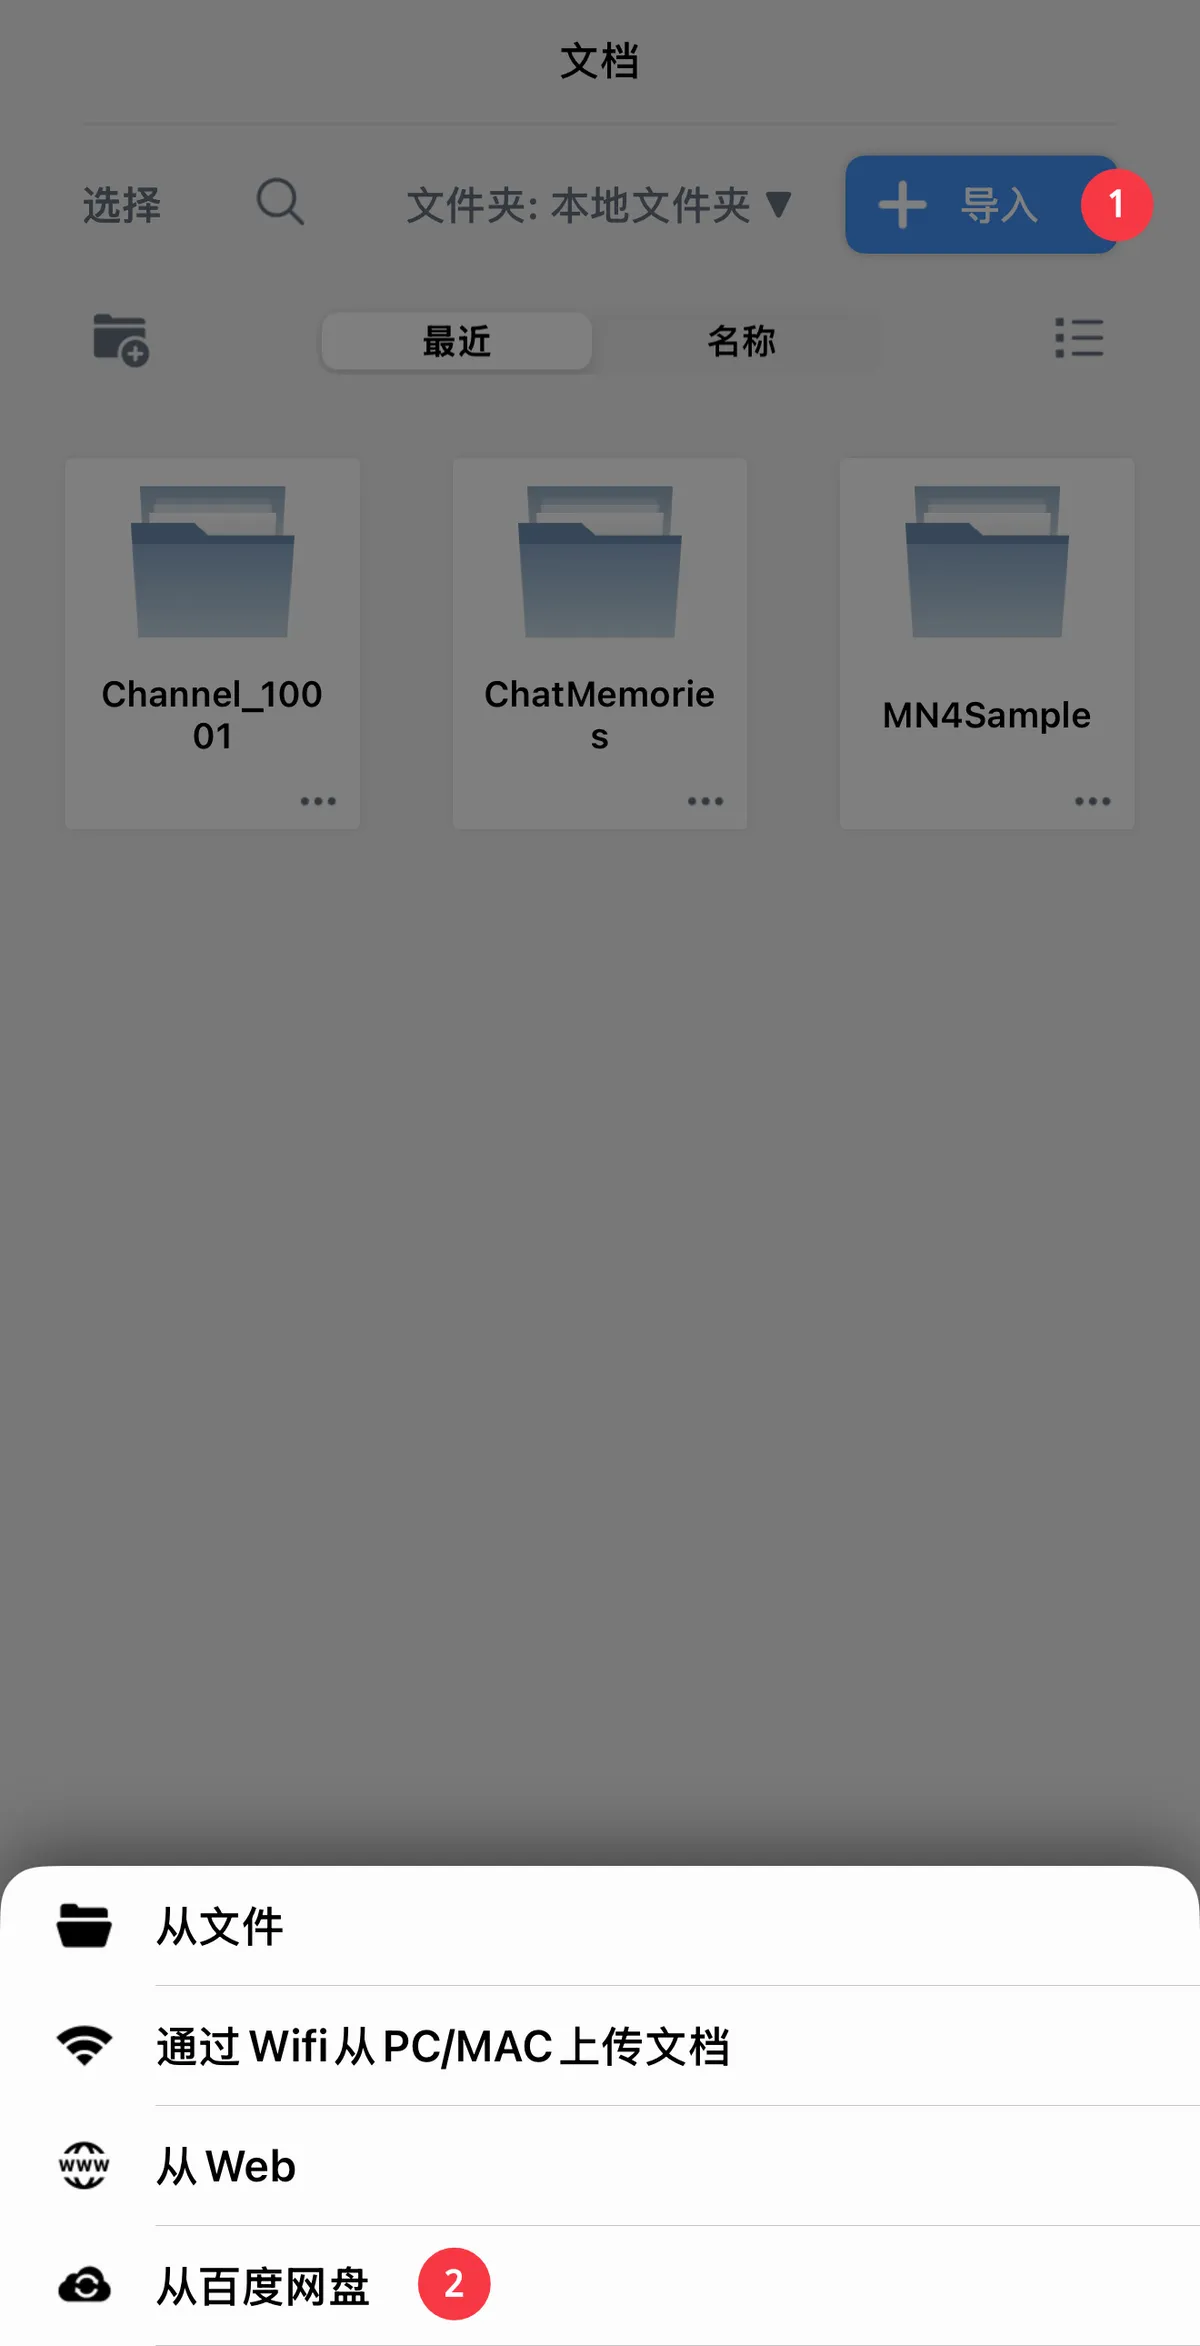
💡The first time you open it, a login pop-up appears. You can log in by scanning a QR code or with your phone number (we recommend using a verification code directly, because Baidu will still verify your phone number even if you enter a username and password).
3 Document Storage Location and Cloud Sync Rules
3.1 When Opening from Another App or Setting the Default PDF Handler to "Open with MarginNote 4"
-
The storage location depends on the page you currently have open in MarginNote:
Examples:
- Open "Study Set: Math" → the imported document is added to that study set's Documents tab but is not added to the study set itself; you need to make an excerpt or tap ➕.
- Open "Category: English" → the imported document is added to the "English" category.
- Open "Folder: Freshman Year" → the imported document is added to the "Freshman Year" folder (if "Import to iCloud Folder by default" is enabled, the file is imported to the iCloud Folder by default even when you currently have a Local Folder page open).
3.2 Local vs. Cloud
-
Documents imported into a "Local Folder" do not participate in cloud sync by default and are not automatically added to cloud sync until all of the following conditions are met:
- The document is added to a study set;
- Cloud sync is enabled for that study set;
- New notes or excerpts have been added to the document within the study set (handwriting / text box / excerpt—any action that adds new notes to the document).
-
Once these conditions are met, the document is automatically moved into iCloud's MNDocs folder and joins sync. For details, see: Data Sync, Backup & Restore and the FAQ: iCloud Sync Guide.
4 Managing Documents
4.1 Categories (Lightweight Grouping)
-
Open the Category page: tap
Categoryon the document management page.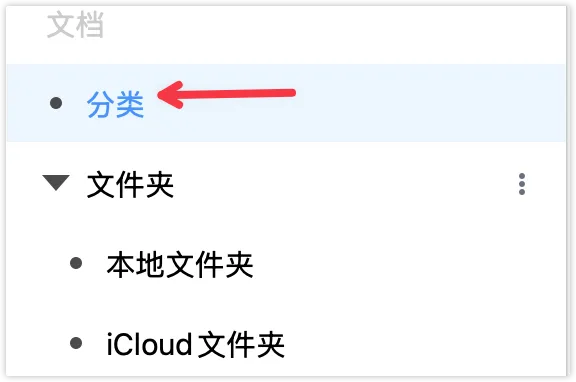
-
Add to a category:
-
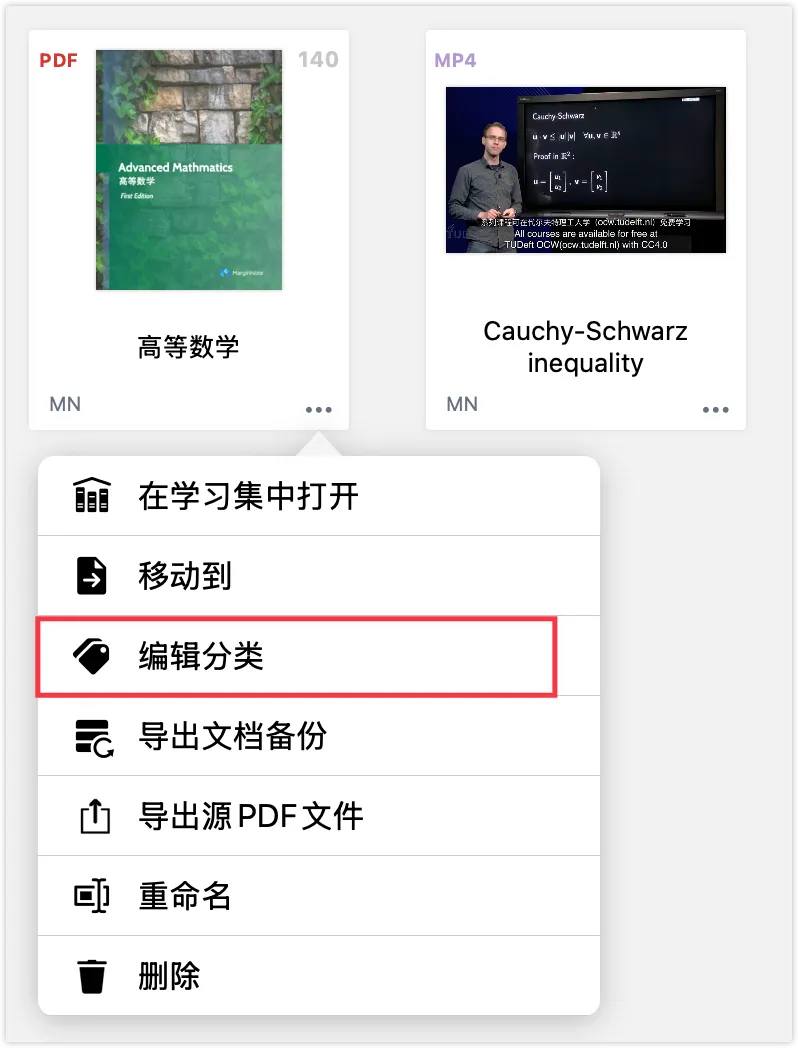
A single document: choose "Edit Category" from the document's "More" menu.
-
Multiple documents: tap the
Selectbutton → check the documents (on Mac, hold ⌘ to multi-select) → "Edit Category" in the bottom toolbar → check the target categories (multiple allowed).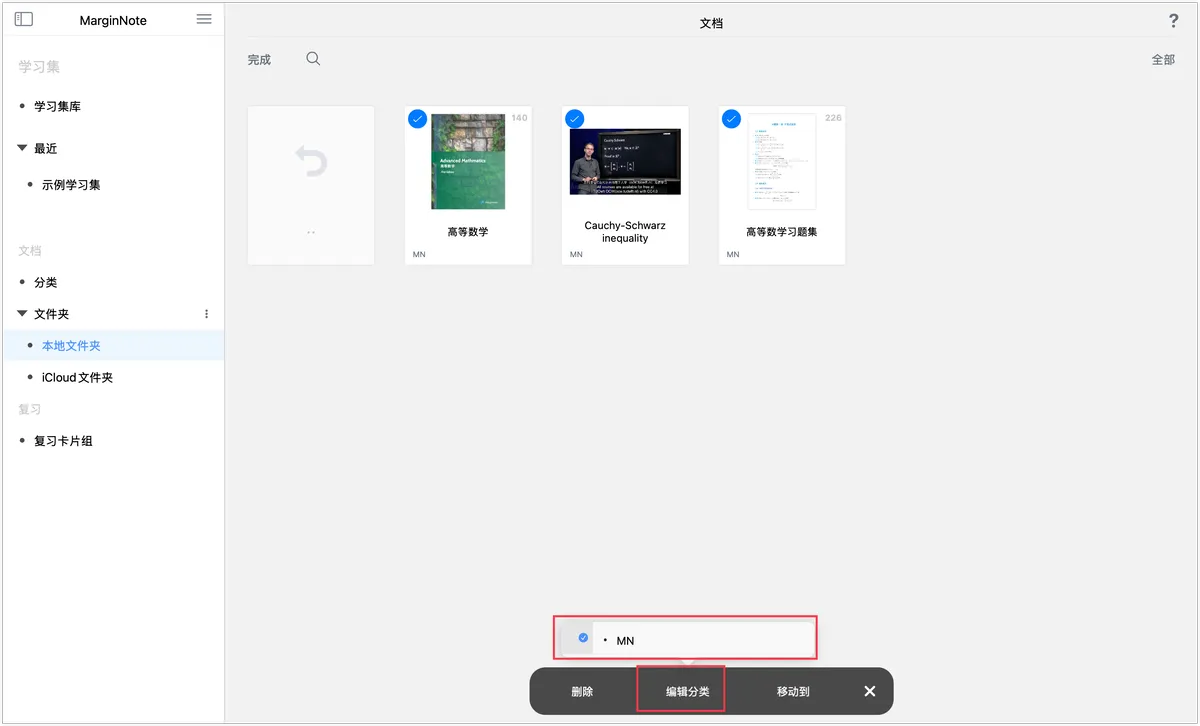
-
-
Manage categories:
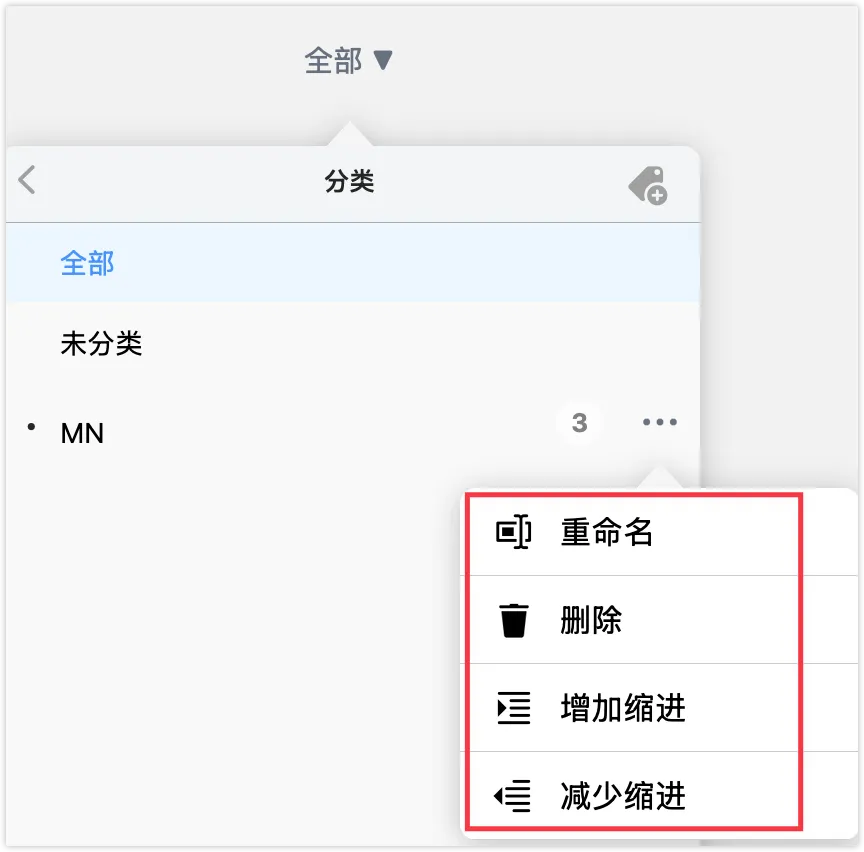
- Tap the
…on the right toRename,Indent/Outdent, orDelete. Indent/Outdent: drag right to indent, drag left to outdent.
- Tap the
4.2 Folders (Structured Organization)
- Create a folder: tap "New Folder" in the top-right of the page.
-
Move documents/folders:
-
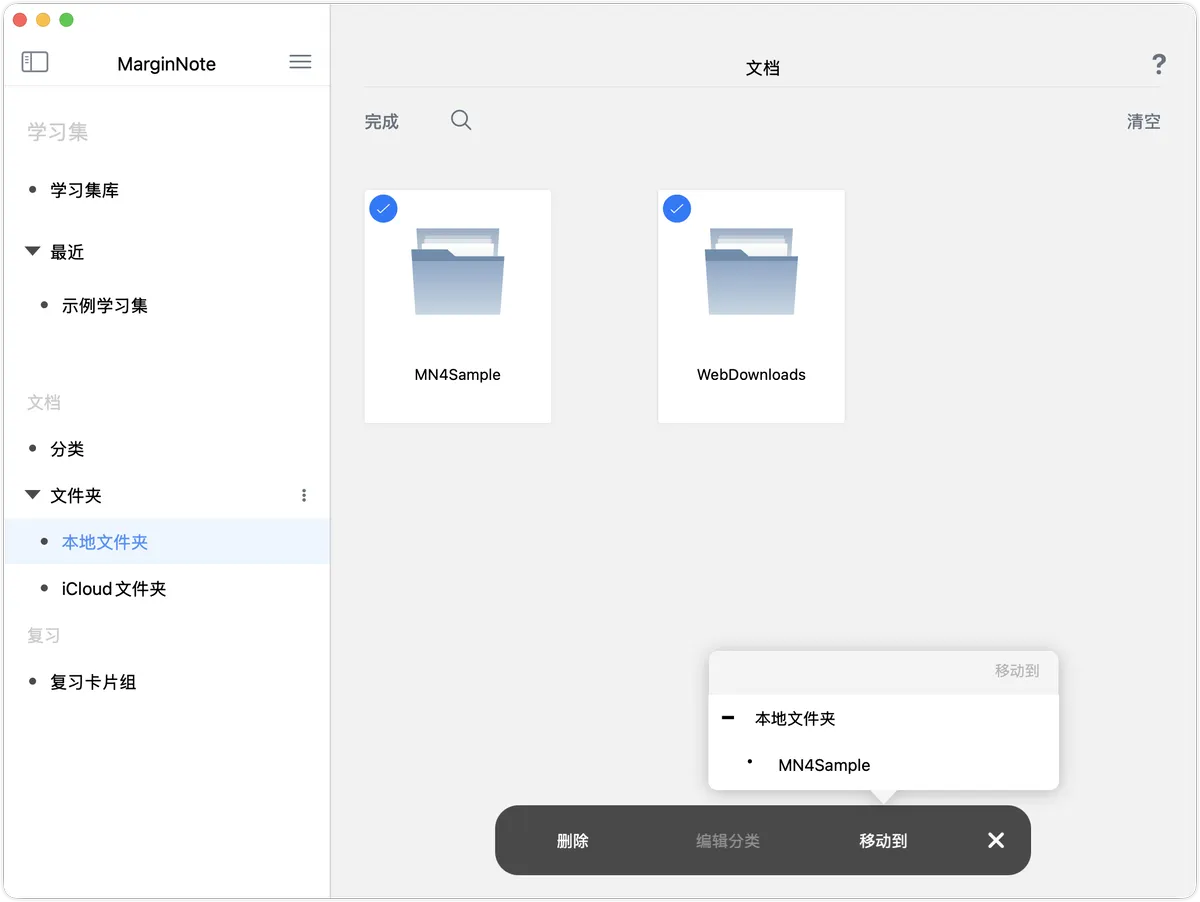
Move after multi-selecting
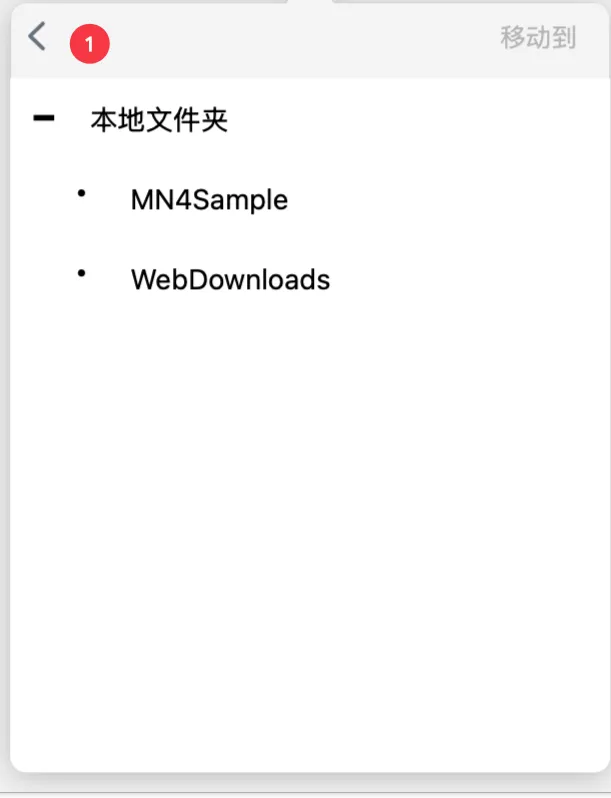
💡You can only move documents (folders) within the Local Folder or within iCloud; you cannot move them between the Local Folder and the iCloud Folder. Tap "Select" in the top-left → check the items → "Move To" at the bottom → choose the target folder → tap "Move To" to confirm.
-
Move via the
...in the bottom-right of a document/folderTap
Move To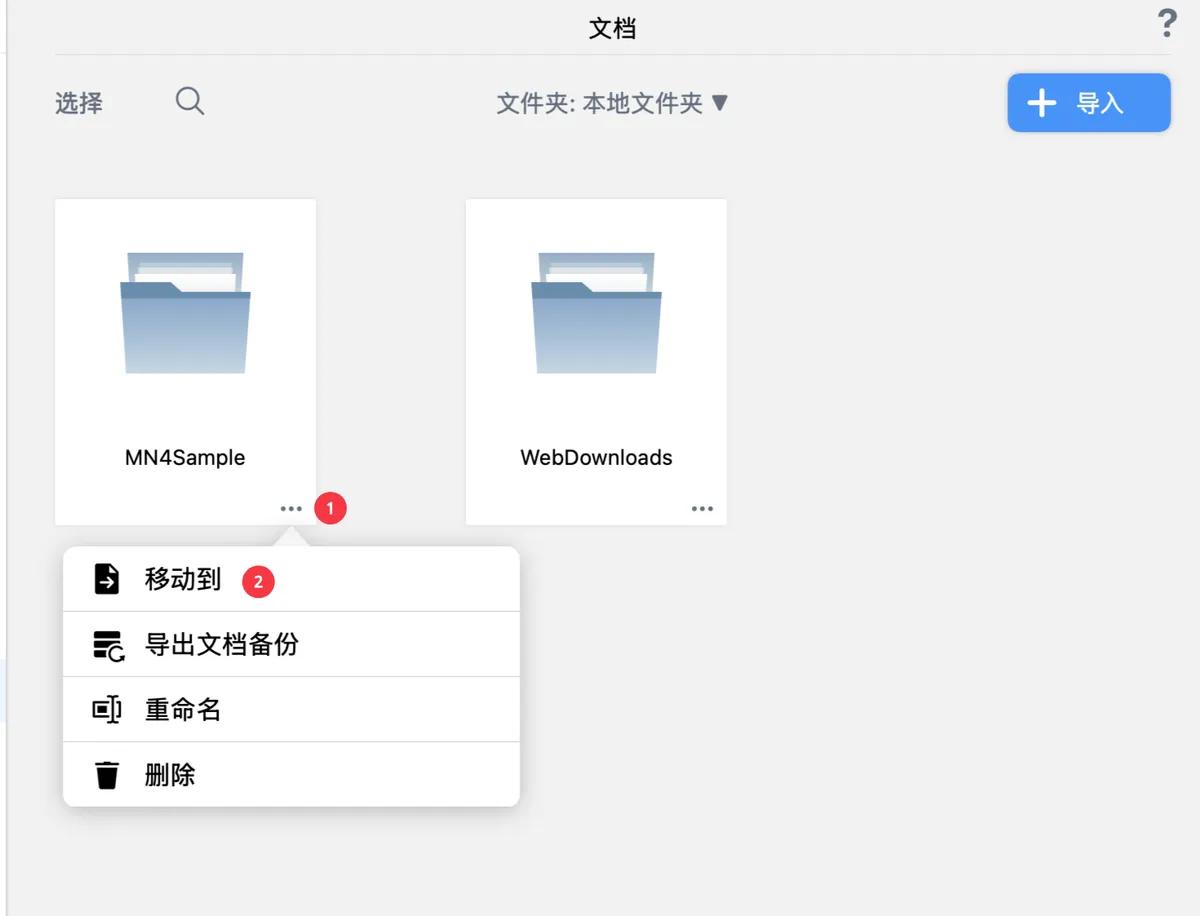
💡Note the back button in the top-left; you can return to the document library to choose another folder.
-