Making Flashcards ②: Adding Cards to a Review Card Deck
💡📖 Flashcard Series Navigation This series helps you master flashcard creation and scientific review in MN4.
Making Flashcards:
- Beginner essentials: ① Getting to Know Flashcards and Review Card Decks ② Adding Cards to a Review Card Deck
- Advanced: ③ Setting Up the Front and Back of Flashcards (this page)
Scientific Review:
- Beginner essentials: ① Scientific Review Based on the FSRS Anti-Forgetting Algorithm
- Advanced: ② Tracing the Source Context
On This Page
On the previous page, Making Flashcards ①: Getting to Know Flashcards and Review Card Decks, you learned how to create your first flashcard. This page will teach you:
- How to bulk-add existing cards to a review card deck
- How to automatically add new cards to review as you create them
- How to efficiently make flashcards with AI (MAX feature)
⚠️ Important: Review card decks are tied to study sets, so all the operations described on this page take place within a study set.
1 Preparation: Bind a Review Card Deck
💡 Before adding cards to review, make sure the current study set is already bound to a review card deck. If you already created a review card deck on the previous page, Making Flashcards ①: Getting to Know Flashcards and Review Card Decks, the study set was bound automatically and you can skip this step.
Steps:
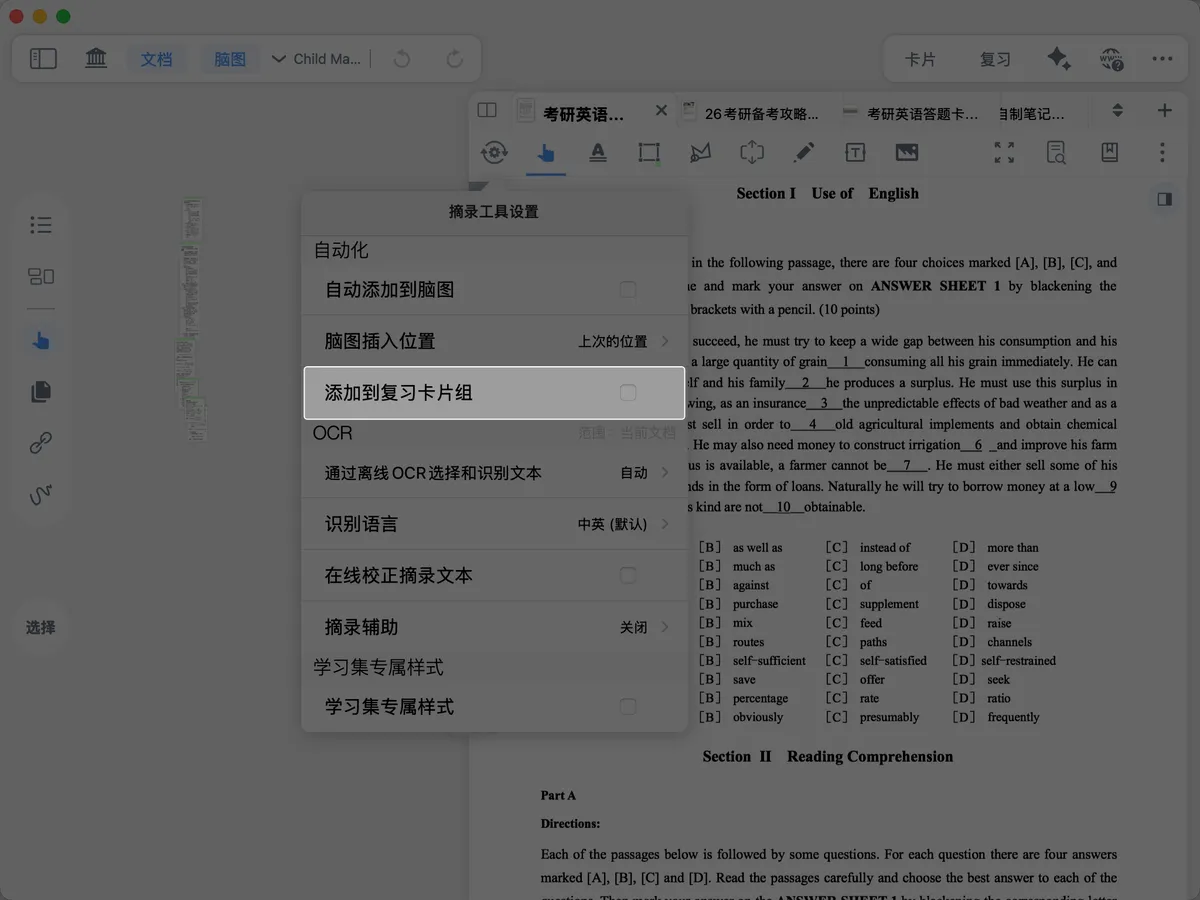
- Open the study set
- Open
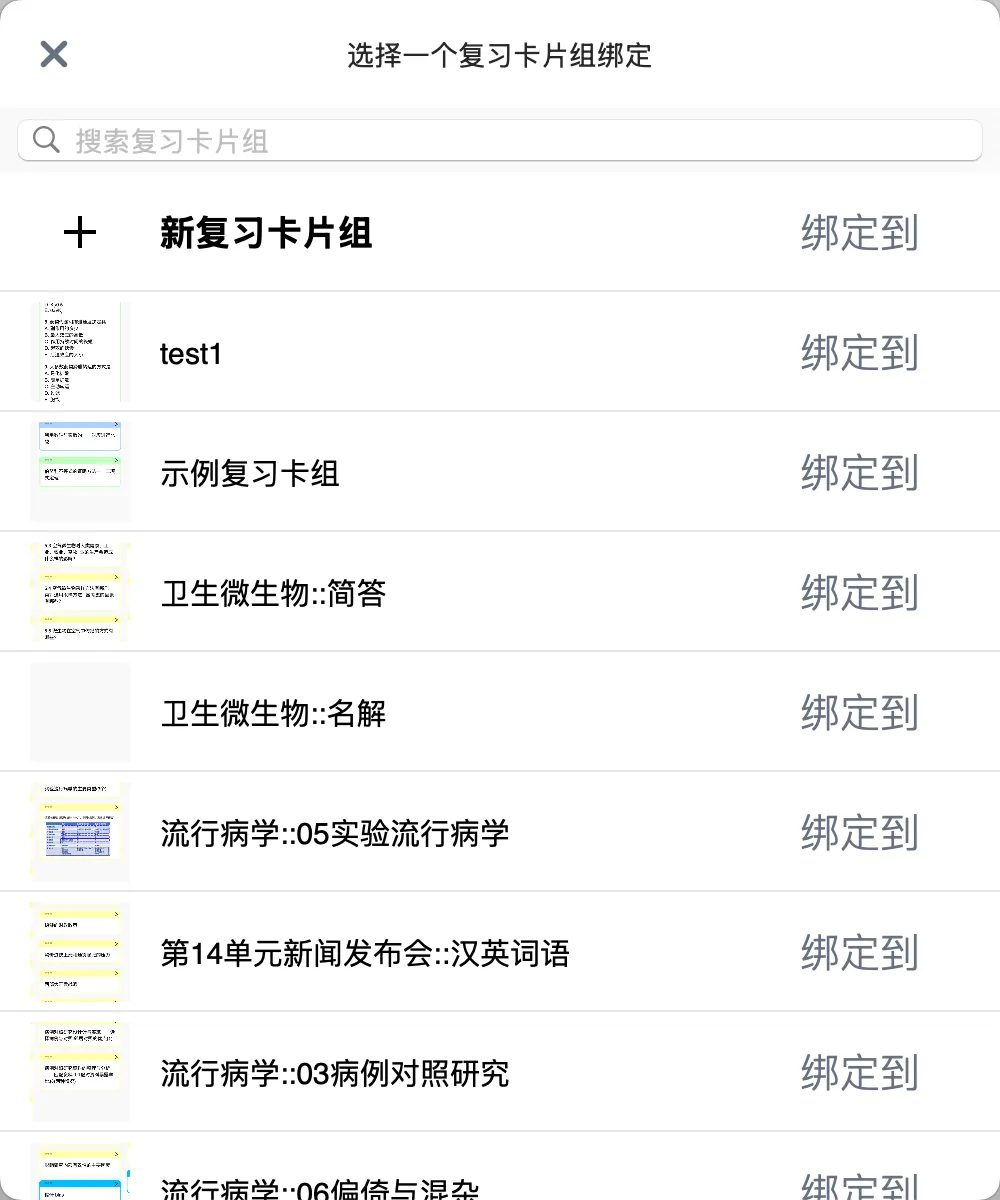
Excerpt Tool Settings - Find the
Add to Review Card Deckoption - Select an existing review card deck, or create a new review card deck
✅ Once binding is complete, you can start adding cards.
2 Bulk-Adding Existing Cards to a Review Card Deck
If you've already made many note cards in the mind map and now want to add them to a review card deck, there are two methods.
2.1 Method 1: Manually Select in the Mind Map
💡 This method works well for adding a small number of cards (1-10).
Steps:
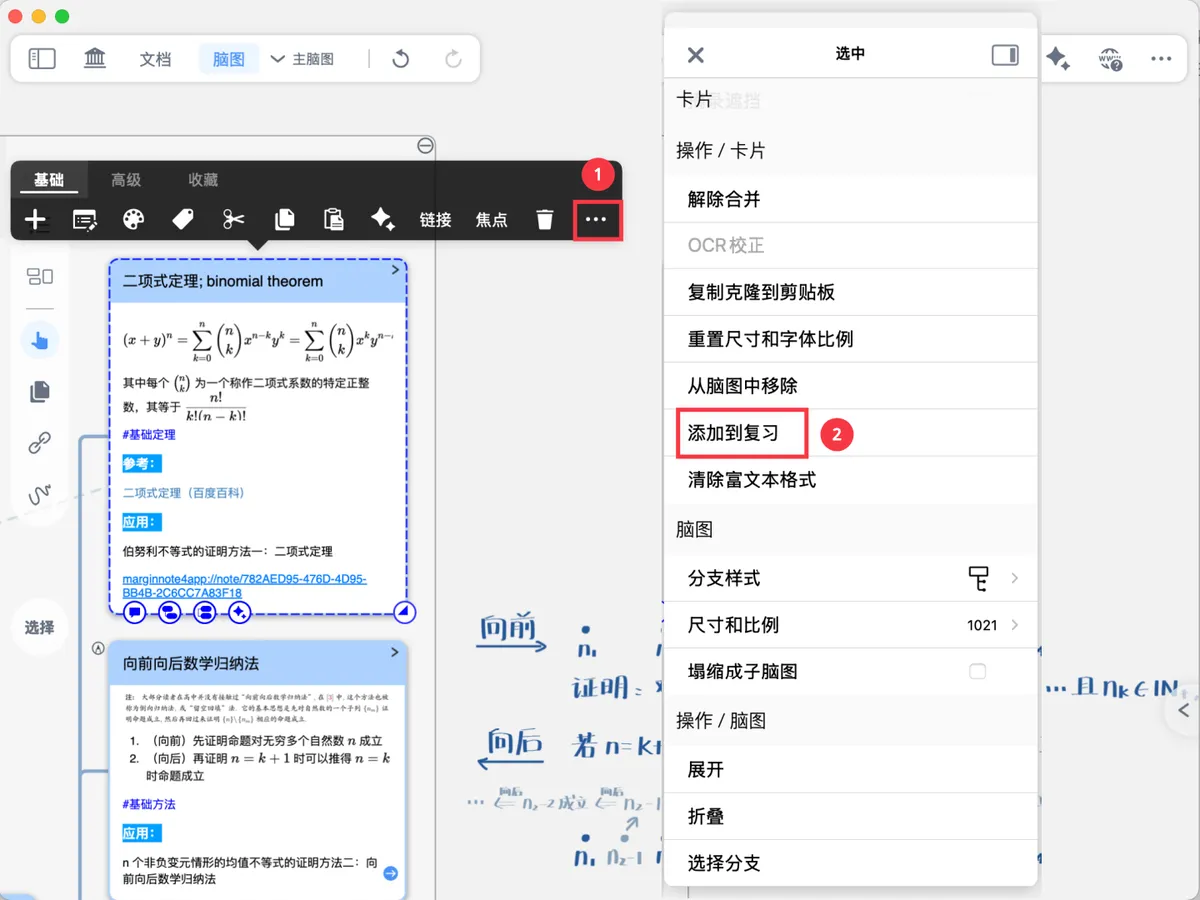
- Select one or more cards in the mind map
- Tap
... More - Select
Add to Review
✅ The selected cards are now added to the review card deck.
2.2 Method 2 (Recommended): Bulk-Filter and Add in the Card Grouping Board
💡 When you have many cards and need to filter them by criteria, the
Card Grouping Boardis more efficient.It's especially suited to these scenarios:
- Adding more than 50 cards
- Filtering cards by criteria (e.g., adding only those tagged #Important)
- Selecting cards from specific chapters across multiple documents
- Bulk-adding by criteria such as color or creation date
What is the Card Grouping Board: A powerful card-management tool that can filter cards by many criteria, including source, tag, color, document, and creation date. For detailed usage, see: Card Grouping Board ①: Precisely Filtering from a Large Number of Cards
Steps:
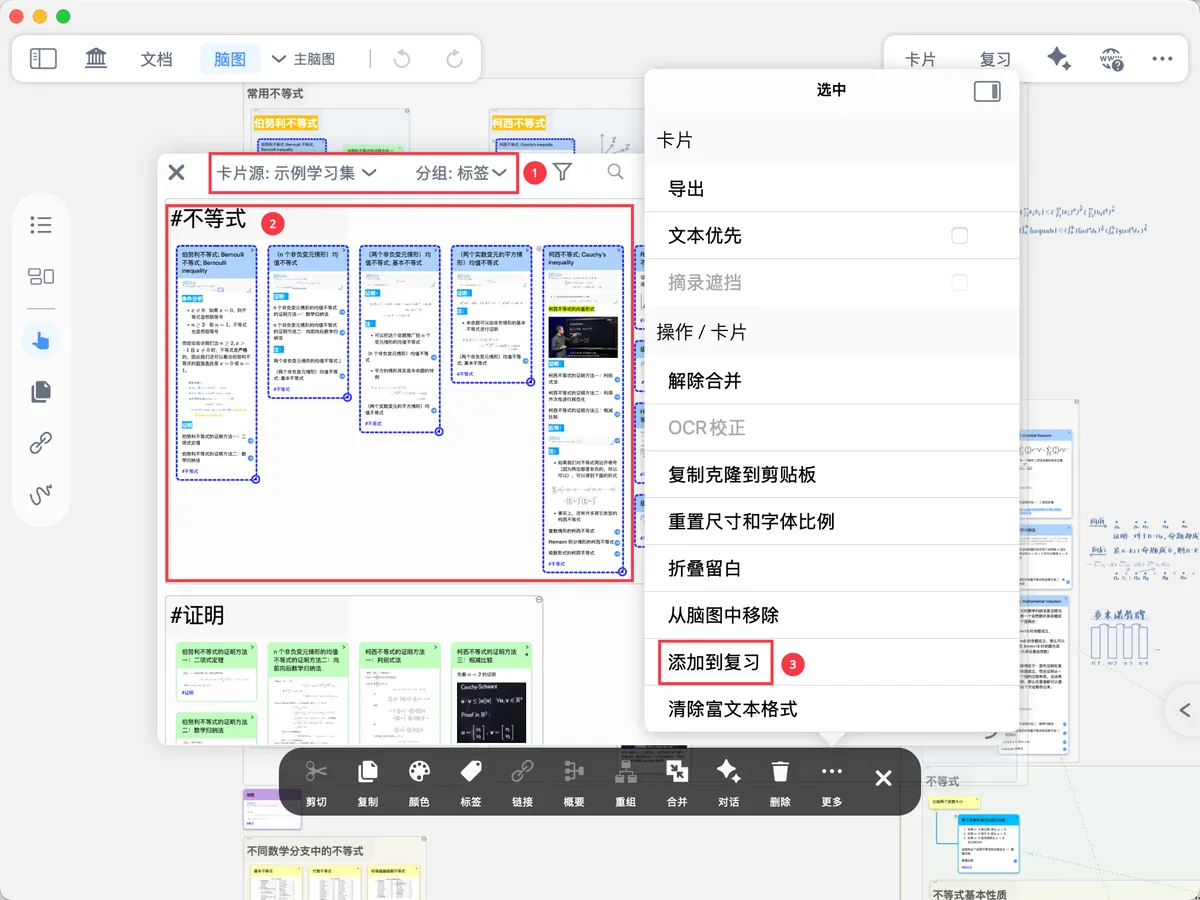
- Tap the
Card Grouping Boardicon in the mind map sidebar -
Choose filter criteria:
- Filter by
Card Source: study set, mind map, document - Filter by
Grouping: color, tag, document, document table of contents, creation date, modification date, title link, and more - Or use the search box to filter by keyword
- Filter by
-
After filtering down to the target cards, select them
- Tap the
Add to Reviewbutton in the pop-up menu at the bottom
💡 Tip: Multiple filter criteria can be combined and intersected. For example, filter for cards that are "tagged #Important + colored blue + from Chapter 3" for precise bulk-adding.
3 Auto-Adding Newly Excerpted Cards to a Review Card Deck
💡 If you're reading new material and making new cards, you can set up automation so that every excerpted card is automatically added to the review card deck, with no manual steps.
3.1 Method 1: Enable the Excerpt Tool's Automation Settings
💡 Before enabling
Override Default Automation Settings, you must first do the prep work: bind a review card deck, otherwiseAdd to Reviewwon't take effect‼️
Steps:
- Open the
card excerpt toolpanel - Enable
Override Default Automation Settings - Confirm that
Add to Reviewis enabled (it's on by default)
✅ Once set up, any card created with any excerpt tool in this study set will be automatically added to the review card deck.
💡 Flexible control: If you don't want certain cards added to review automatically, you can turn off
Add to Reviewindividually in the corresponding card excerpt tool.
3.1.1 Also Set Color, Tags, and Emphasize (Optional, Recommended)
💡 After enabling the automation settings, you can also preset a color, tags, and emphasis for an excerpt tool, reducing the effort of refining flashcards later.
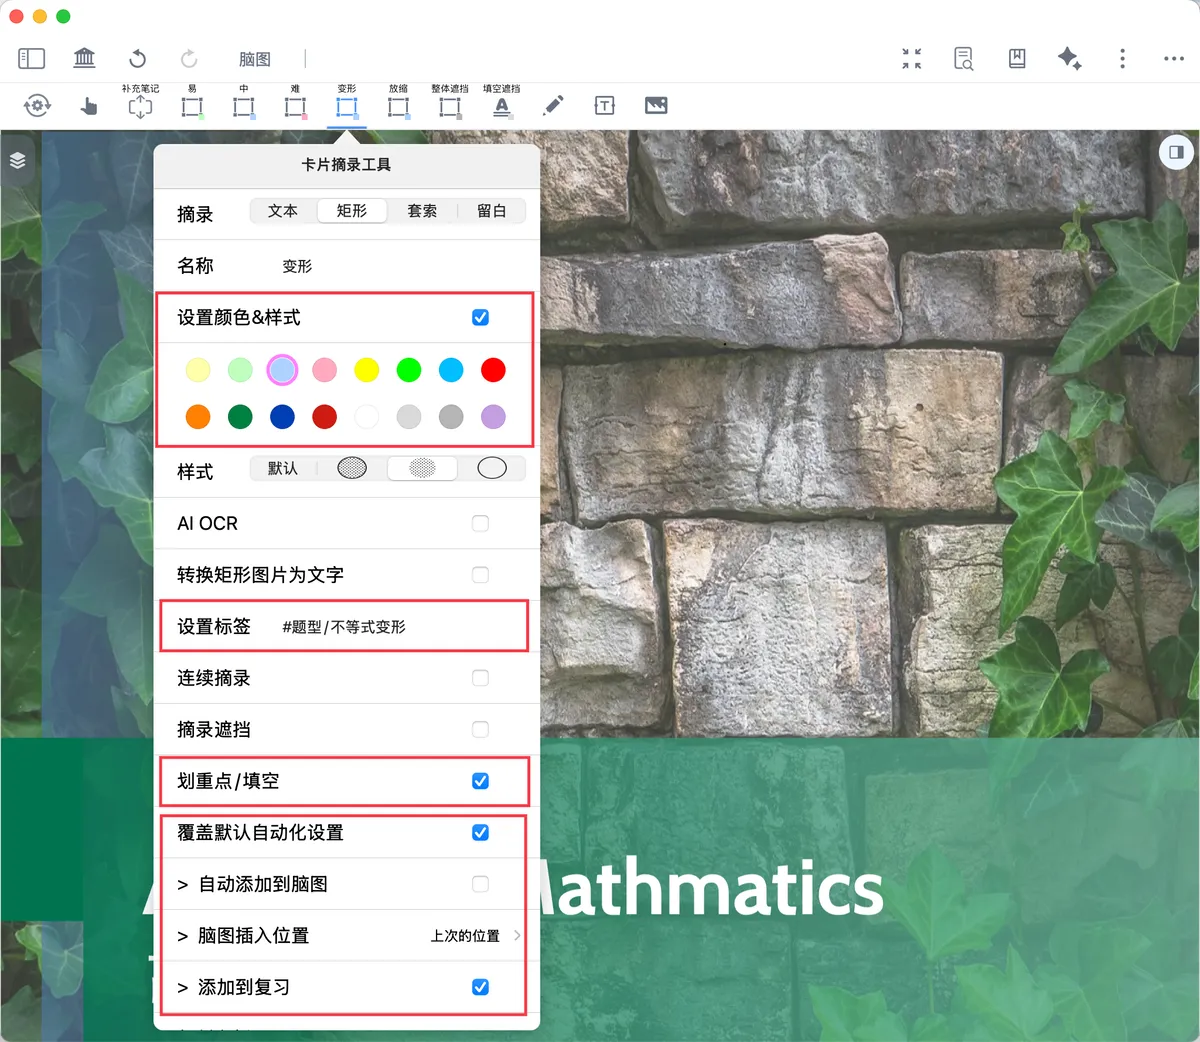
Color: If you set a color for an excerpt tool, the excerpts (cards) created with that tool will automatically use the preset color.
💡 You can assign specific meanings to card colors based on your own preferences and needs. For example, blue for key points and red for error-prone material, making it easy to filter cards by color later.
Tags: If you set a tag for an excerpt tool, the excerpts (cards) created with that tool will automatically get the preset tag. Tags support hierarchy, divided by "/": parent tag/child tag.
💡 You can preset specific tags based on your preferences and needs, such as #TermDefinition, #ShortAnswer, #Mistakes, #FrequentlyTested, and so on, making it easy to filter cards by tag later.
-
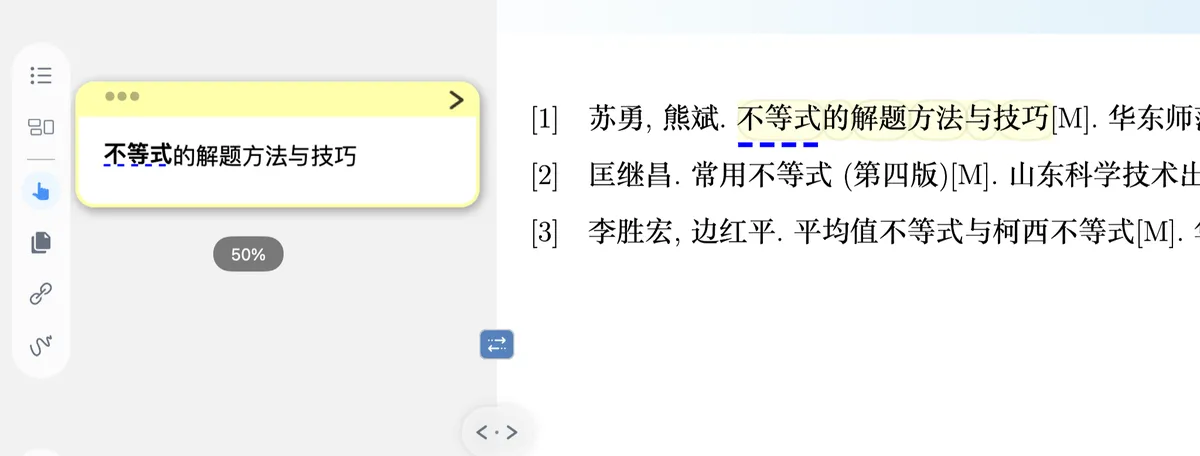
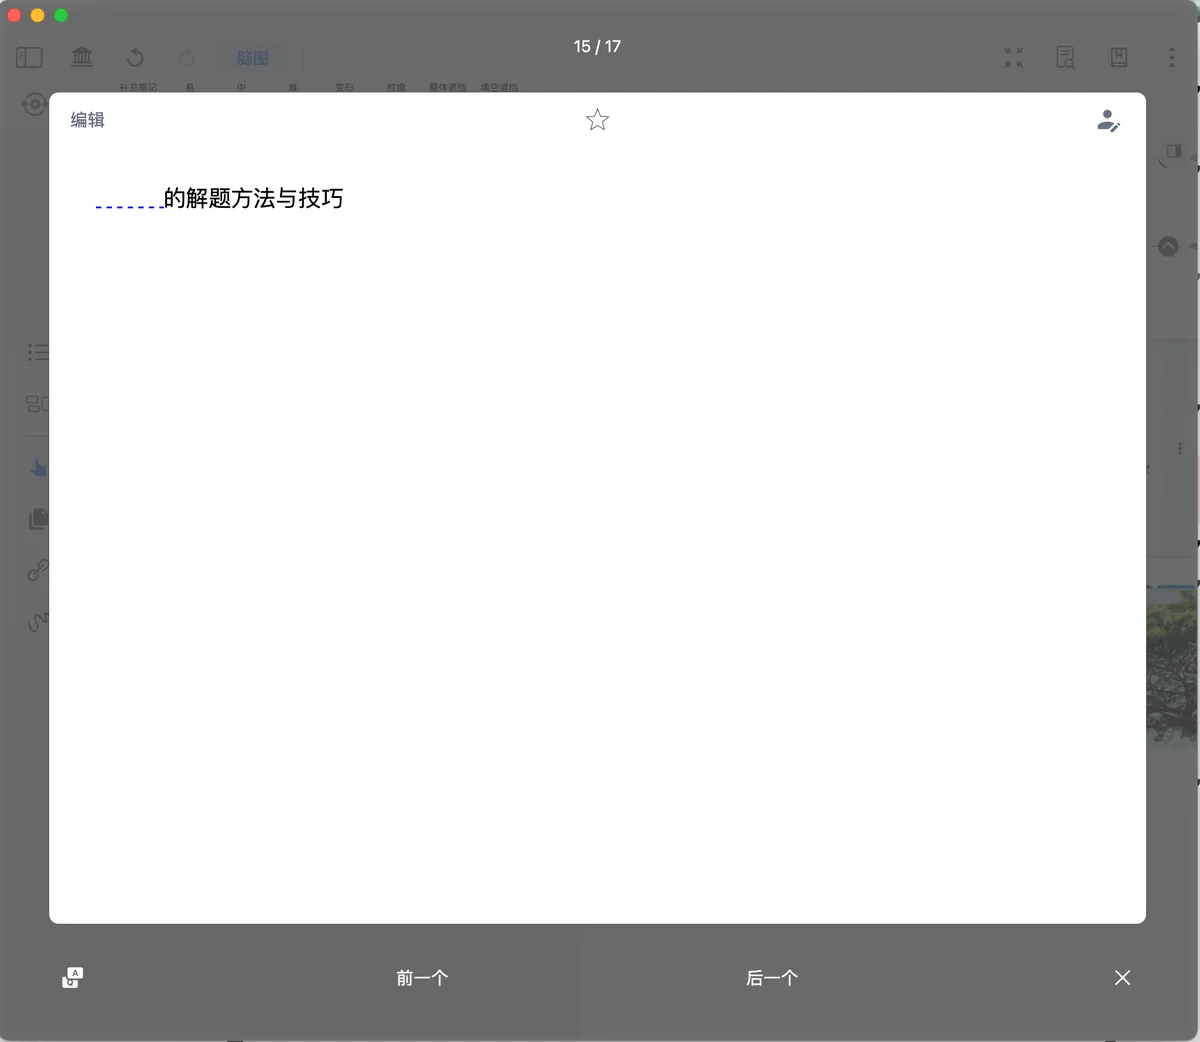
emphasize/cloze: Once enabled, you can emphasize parts of an excerpt; during review, the emphasized parts are blanked out (clozed), creating fill-in-the-blank flashcards.- For text excerpts, tap the key characters to emphasize them; emphasized characters automatically display a blue underline.
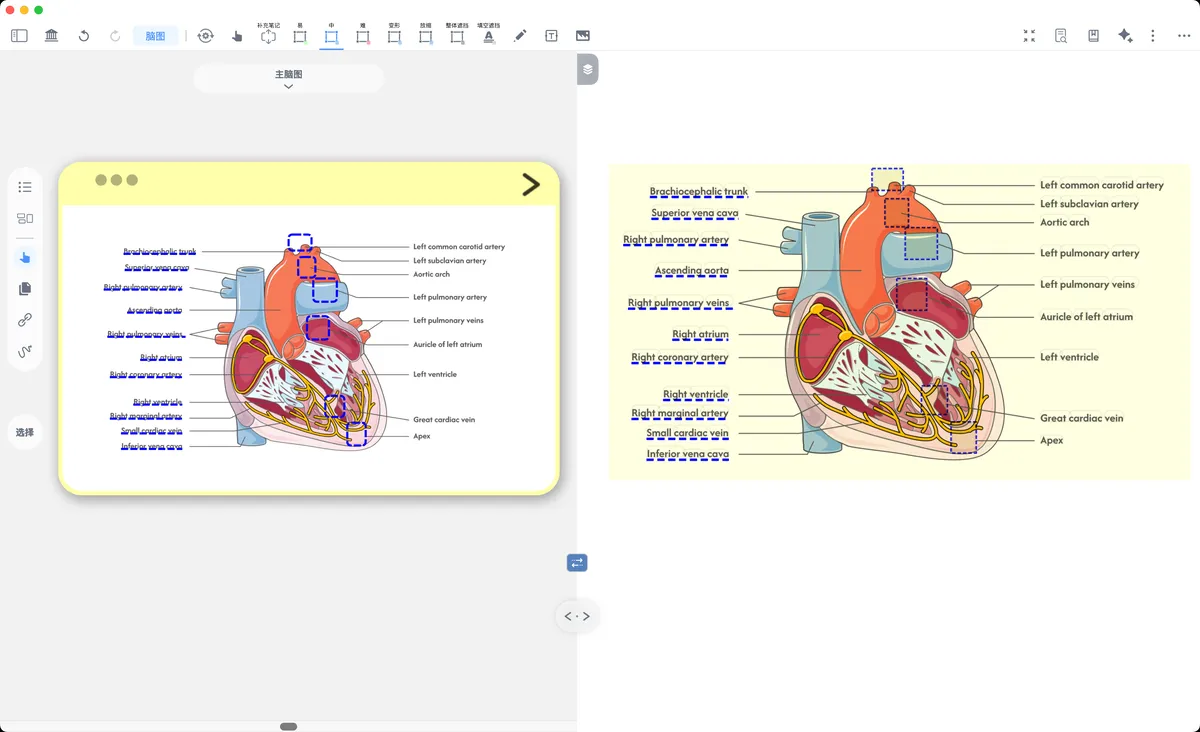
- For rectangular excerpts, tap the key characters or box-select a key image region to emphasize them; emphasized characters automatically display a blue underline, and box-selected image regions get a blue dashed border.
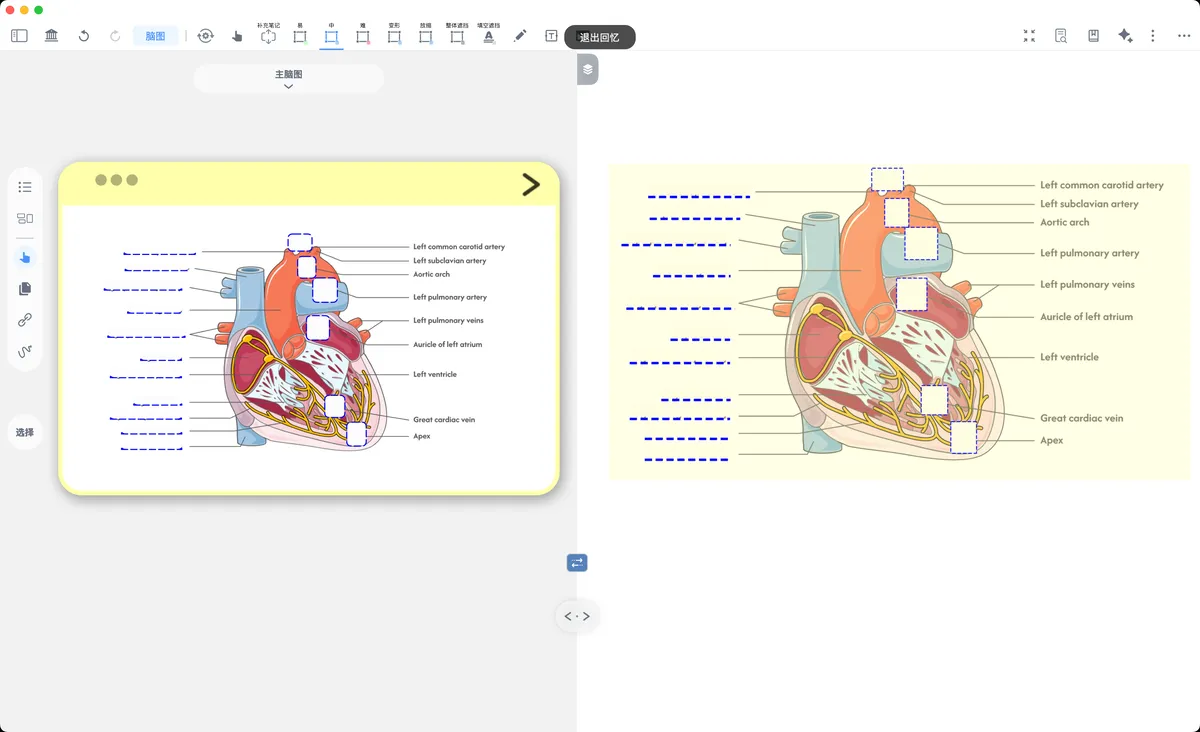

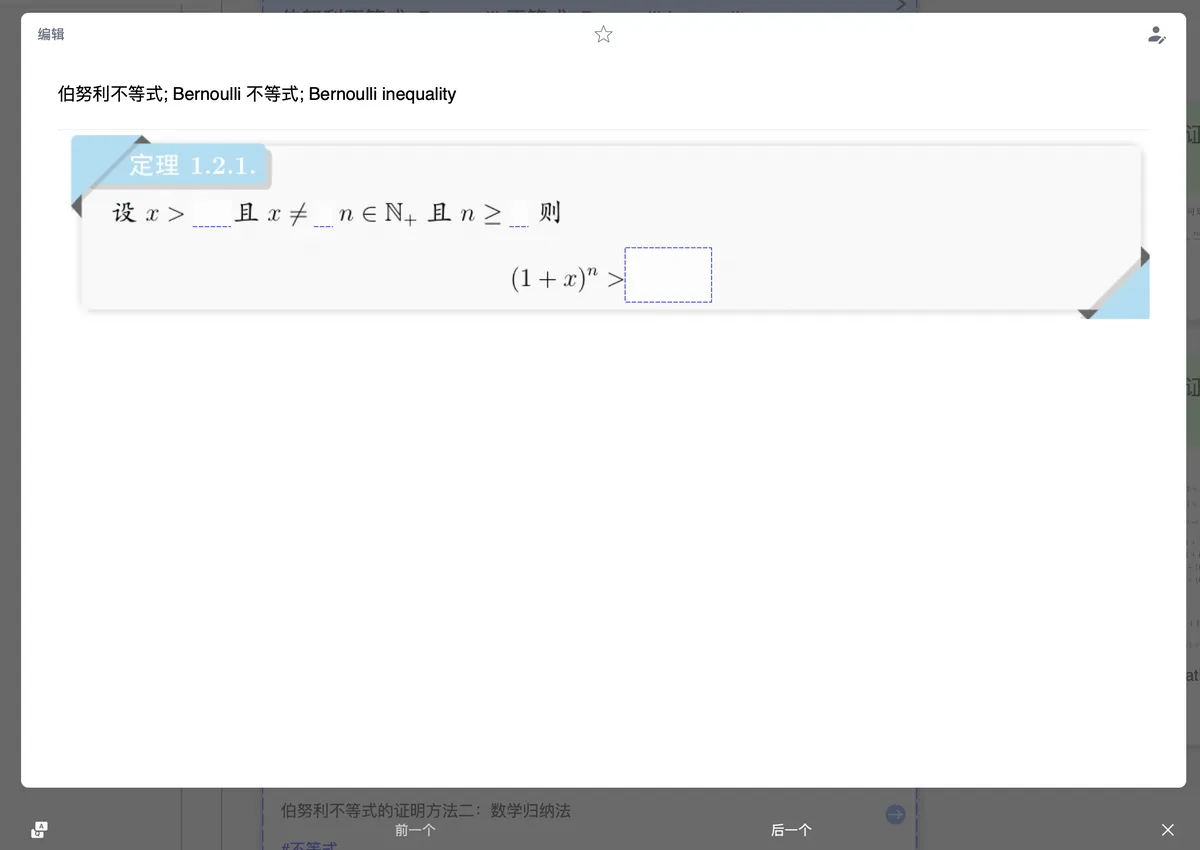
💡 Tip: For more ways to use emphasize (such as bulk-emphasizing in a review card deck or setting up cloze groups), see: Making Flashcards ③: Setting Up the Front and Back of Flashcards
3.2 Method 2: Generate Flashcards with AI OCR and Extra Actions (MAX feature)
💡 Advantages of making cards with AI OCR:
- Automatically recognizes the text in an image, with no manual typing needed
- Uses a prompt to have AI automatically extract core concepts and explanations, generating standard-format flashcards
- Generates and adds to review in one tap, saving a lot of card-making time
Well suited to image content such as scanned textbooks and screenshots
Steps:
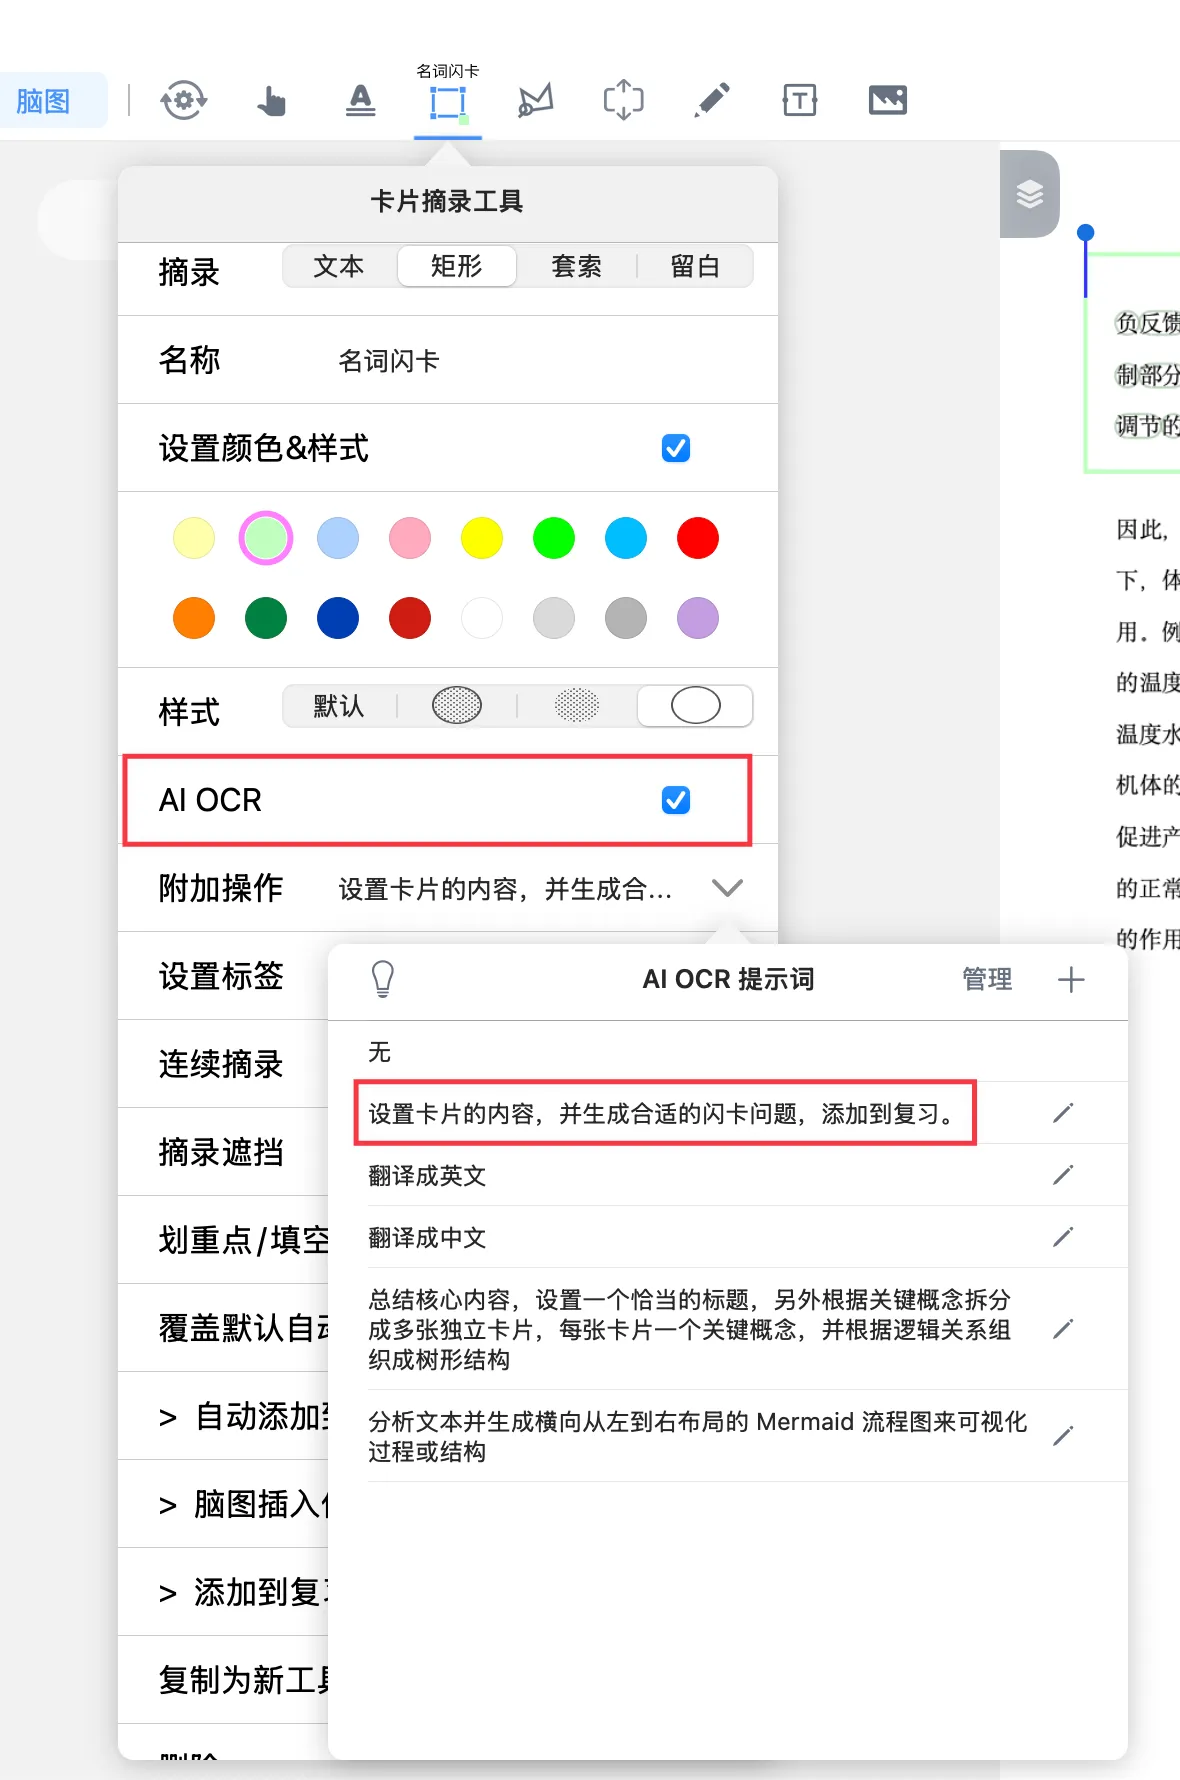
- Open the
card excerpt toolpanel - Enable
AI OCR - In
Extra Actions, enter a prompt asking AI to make flashcards for you and add them to review
Example prompt: Set the card's content and title—extract the core concept as the title and the concept's explanation as the content. Create a suitable flashcard question, and add to review.
✅ When you use this excerpt tool, AI automatically recognizes the image content, extracts concepts and explanations, generates flashcards, and adds them to review.
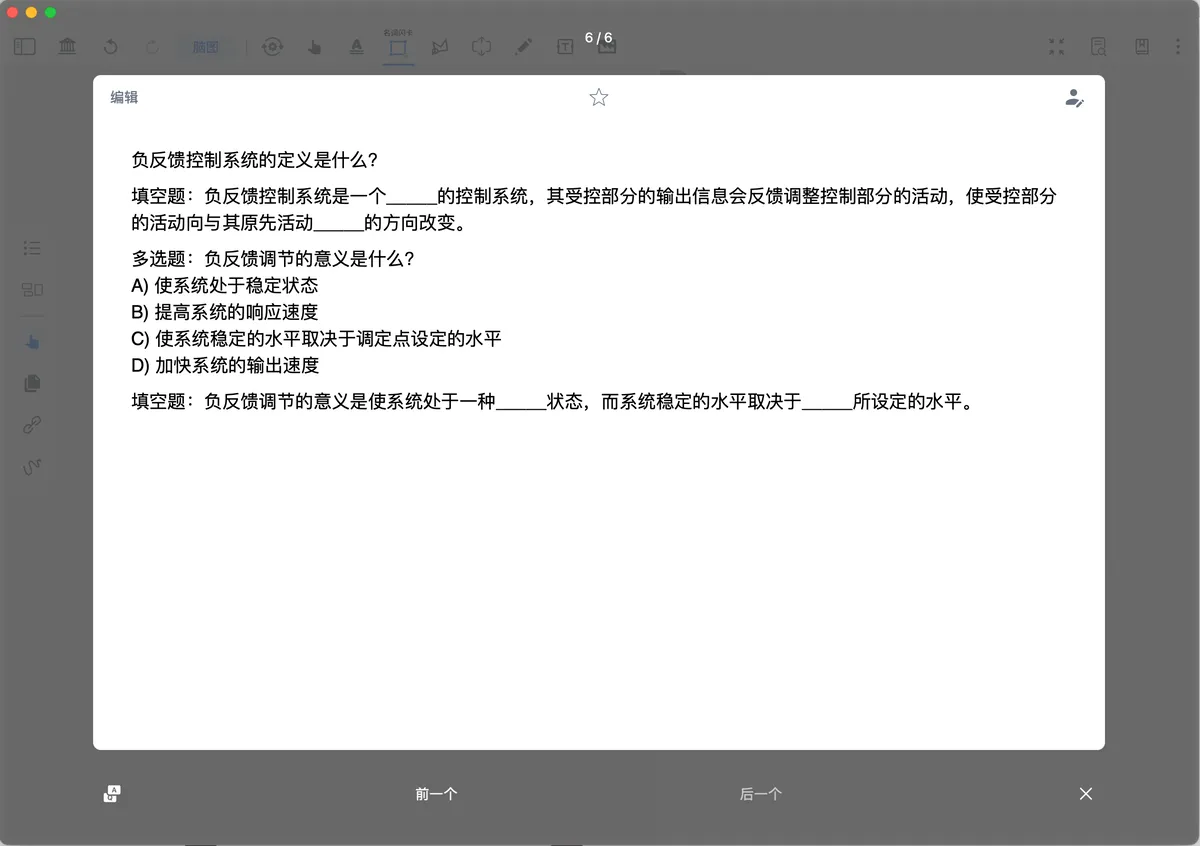
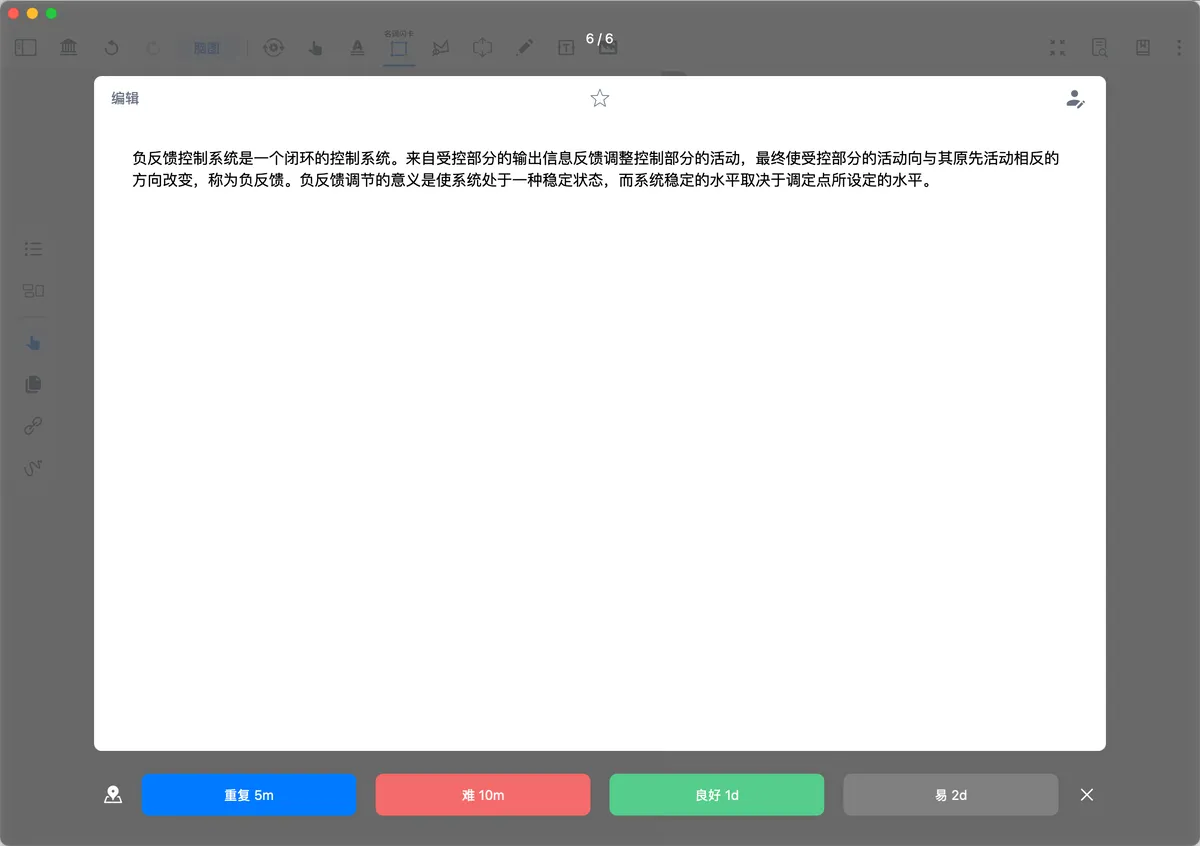
3.3 Method 3: Generate Flashcards with AI Chat
💡 Compared with AI OCR, AI Chat has more powerful tool-calling and batch card-making capabilities, and can handle more complex, more specialized card-making requirements.
How to choose between AI OCR and AI Chat?
- If you're a beginner, or you just need to make cards incidentally while excerpting, use AI OCR (Method 2)
- If you need to make flashcards in bulk, use AI Chat (Method 3)
Steps:
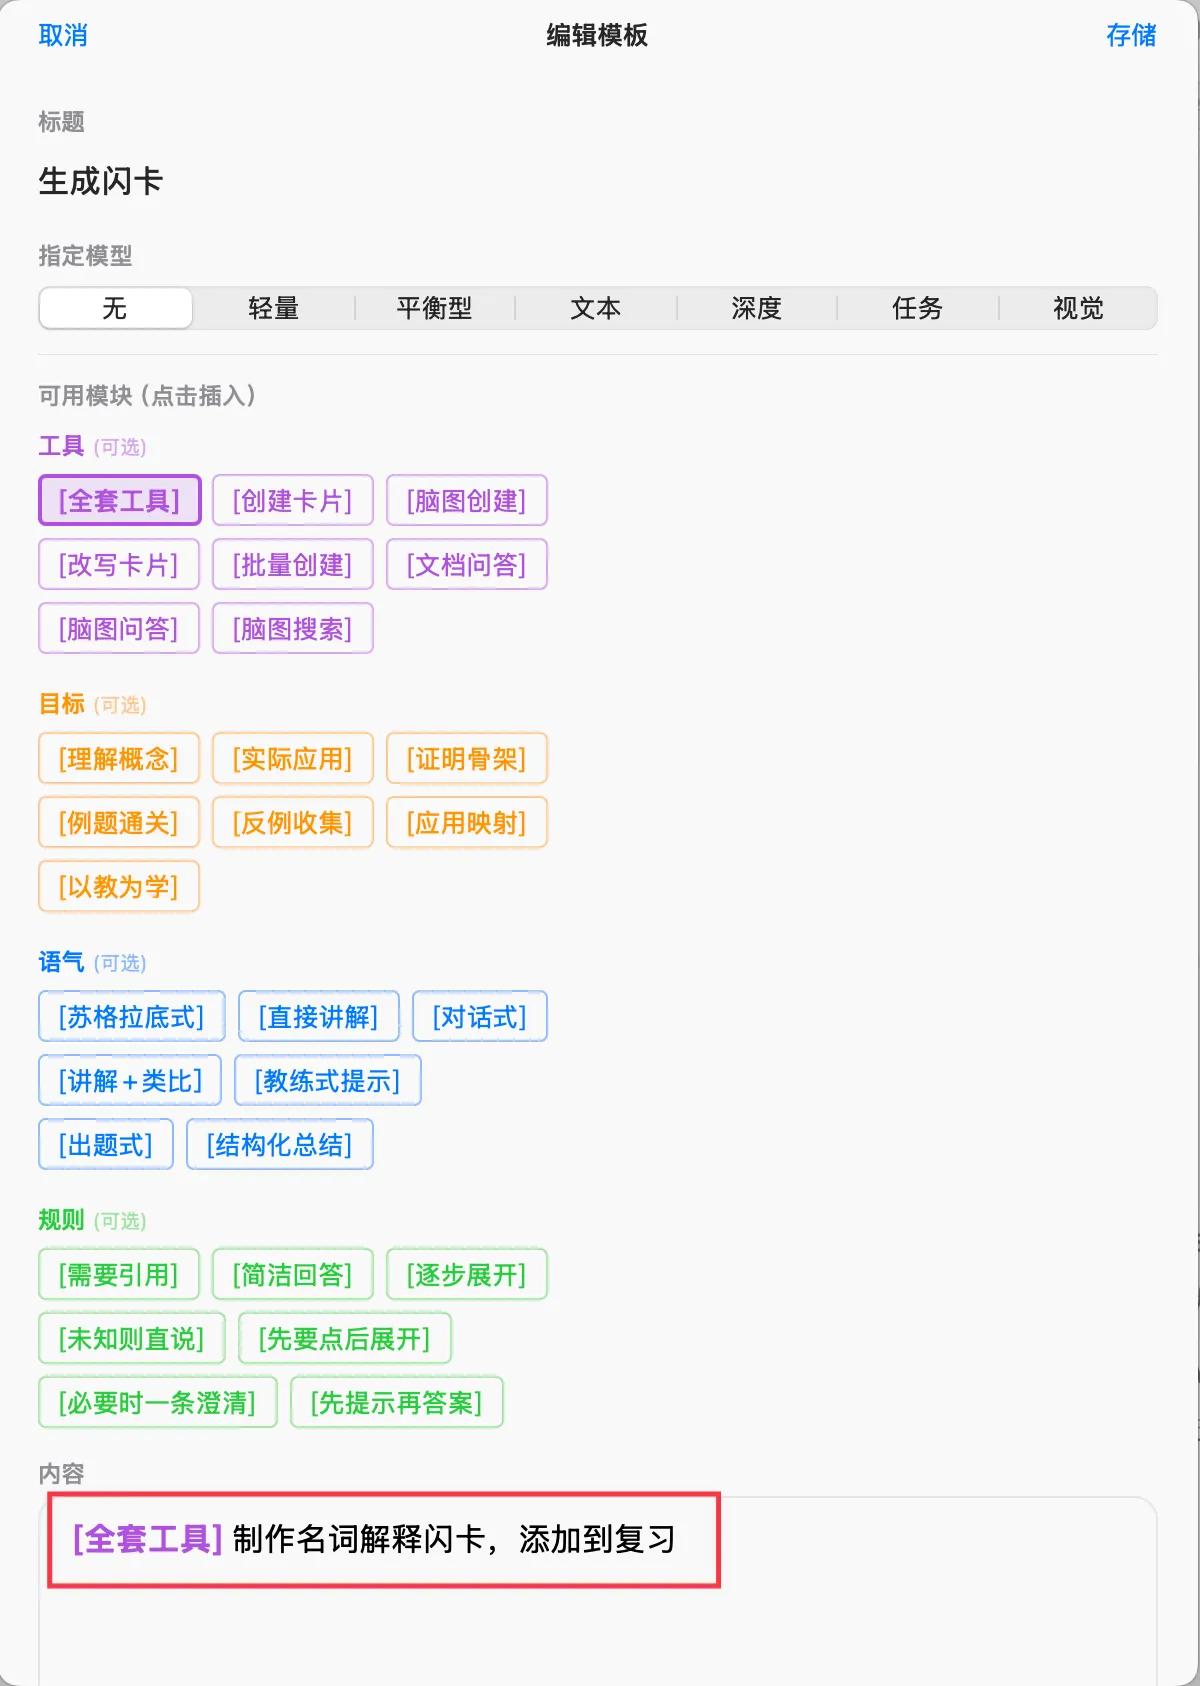
Step 1: Create a Prompt Template
Create a prompt template, for example: [Full Tools] Make term-definition flashcards and add them to review;
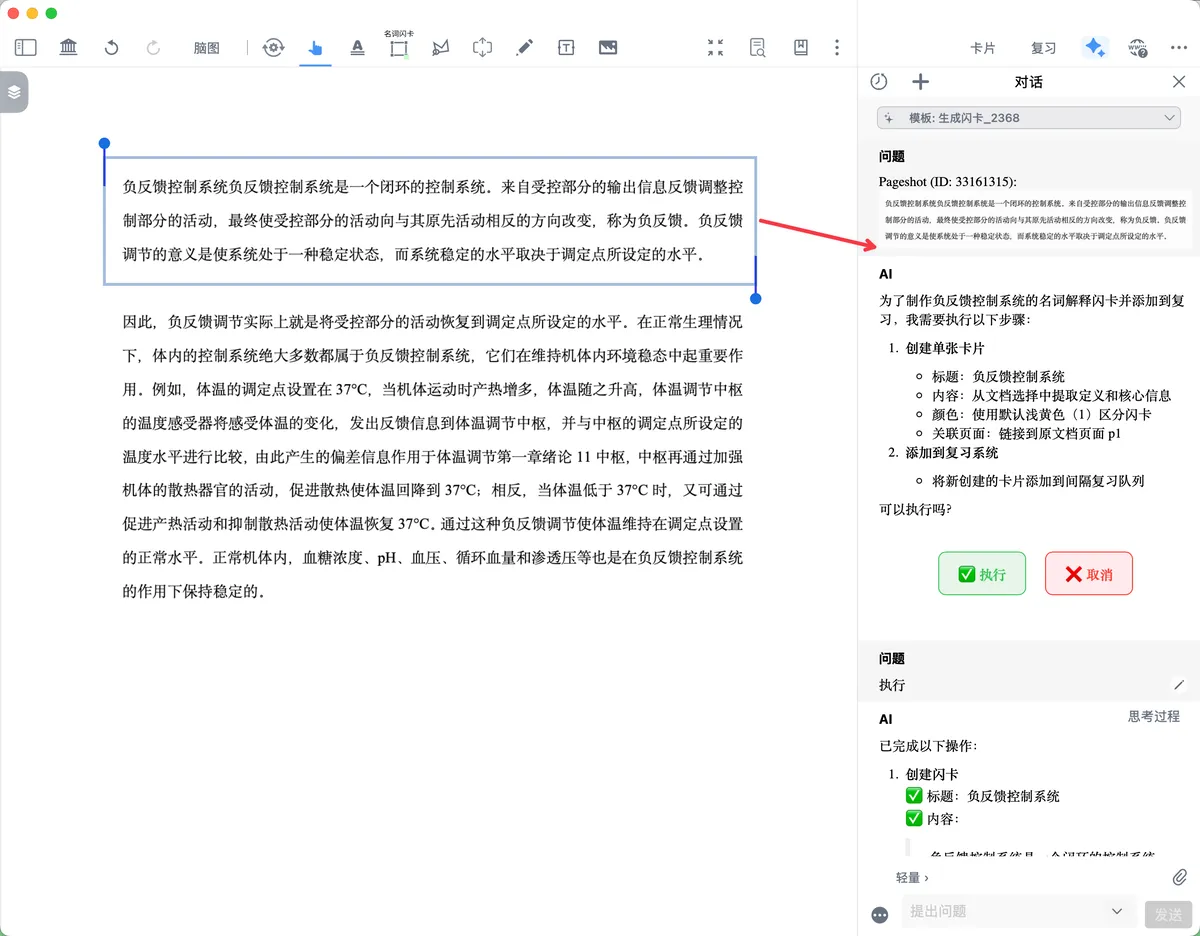
Step 2: Select Content and Send It to AI Chat
- Select the content you want to turn into cards in the document
- Send it to the AI Chat window
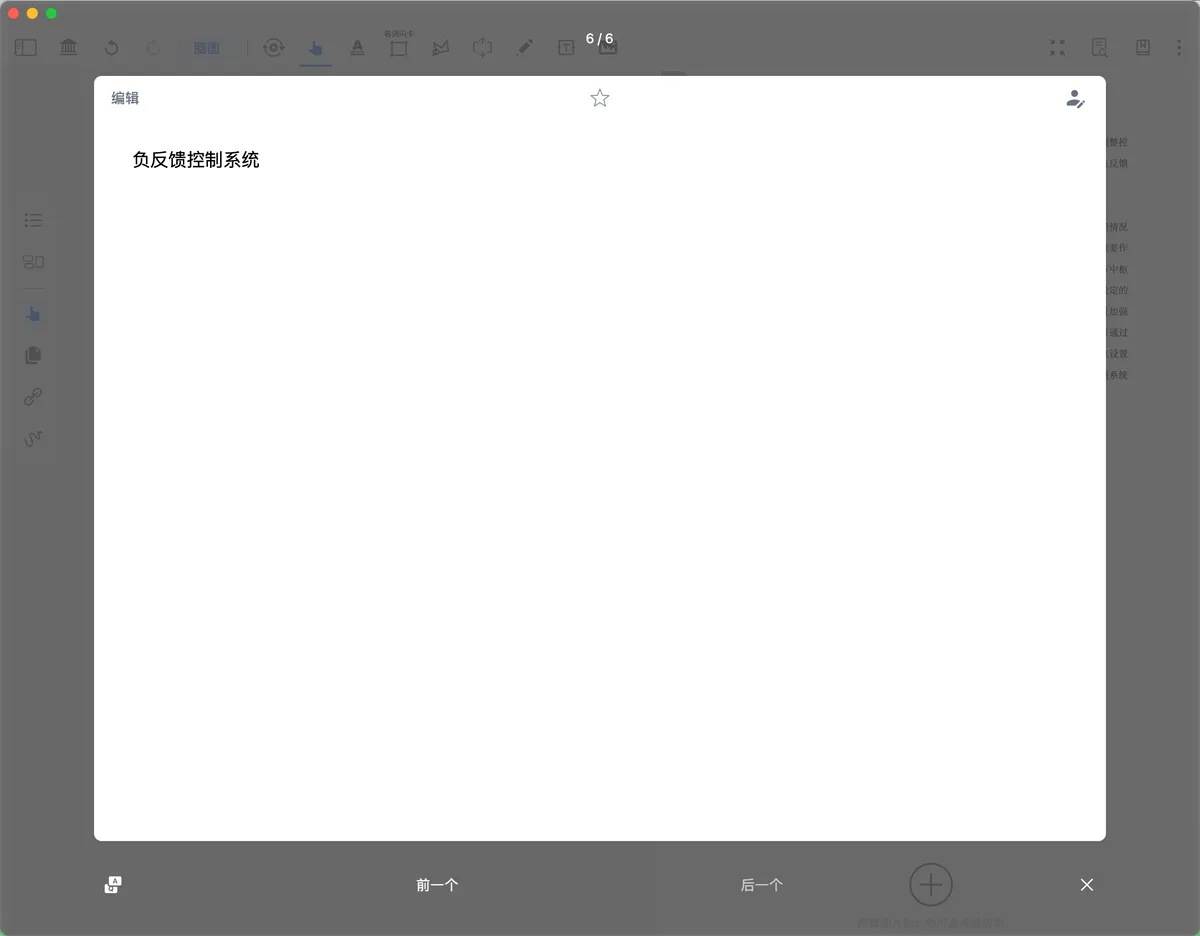
- AI will automatically carry out the prompt's instructions, making flashcards for you and adding them to review
✅ AI will process the selected content in bulk, automatically generating multiple flashcards and adding them to the review card deck.
💡 Tip: For how to write more efficient prompt templates and more advanced ways to use AI Chat, see: Getting to Know the Chat Sidebar: reconstruct your full thought process, use modules wisely, and write a great prompt in 3 seconds
4 Removing from Review
5 📌 Next Steps
Congratulations—you've mastered several ways to add cards to a review card deck!
Now you can:
- ✅ Add existing cards manually or in bulk
- ✅ Automatically add new cards while excerpting
- ✅ Efficiently make flashcards with AI
Next, learn how to set up the front and back of your flashcards to make more effective review cards:
→ Continue reading: Making Flashcards ③: Setting Up the Front and Back of Flashcards
If you already have enough cards, you can also jump straight into learning the scientific review method:
→ Start reviewing: Flashcard Review ①: Scientific Review Based on the FSRS Anti-Forgetting Algorithm