Handwriting: Write Freely in Documents, Mind Maps, and Cards
1. General Handwriting Settings for Each Scenario
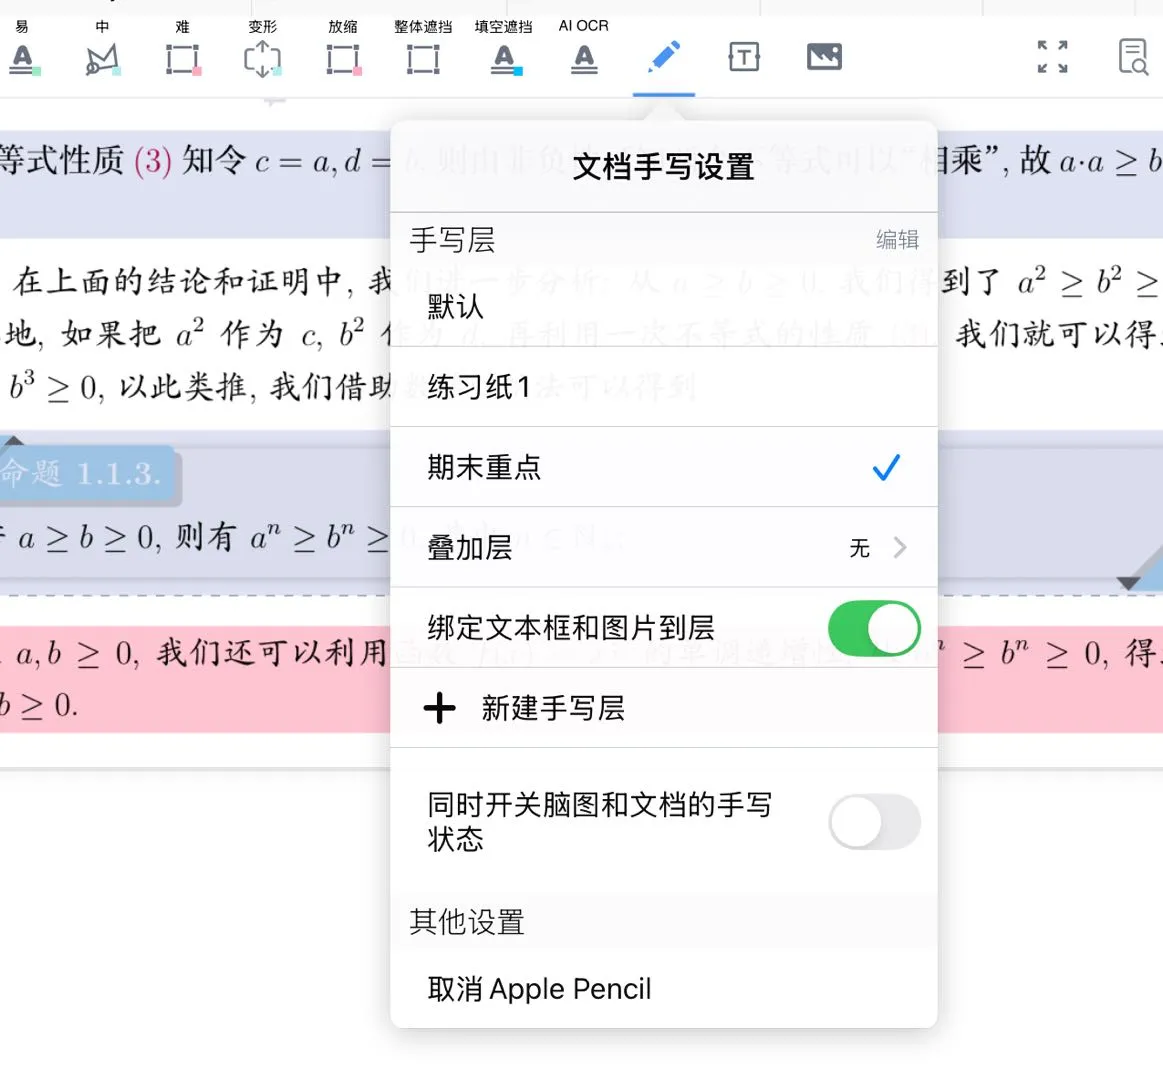
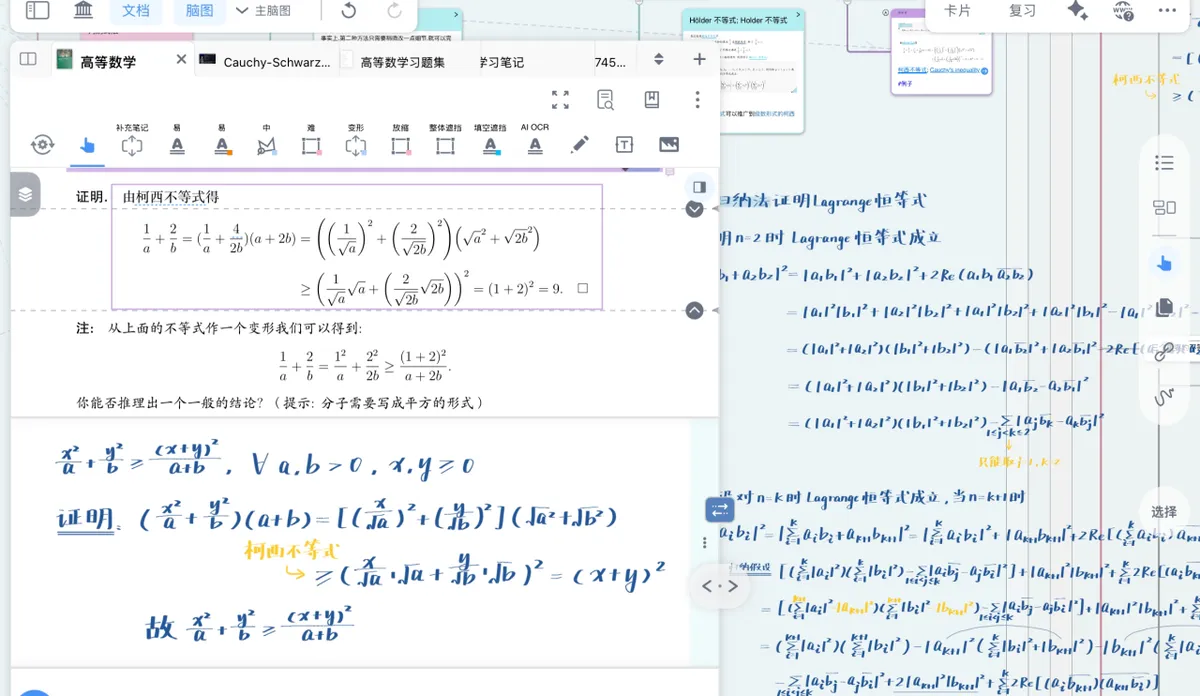
Document Handwriting Settings
Document handwriting tool
- Tap the handwriting tool at the top of the document (shown above), choose a pen type from the
handwriting toolbar, and you can write freely in the document. - Double-click the
document handwriting toolto change its settings
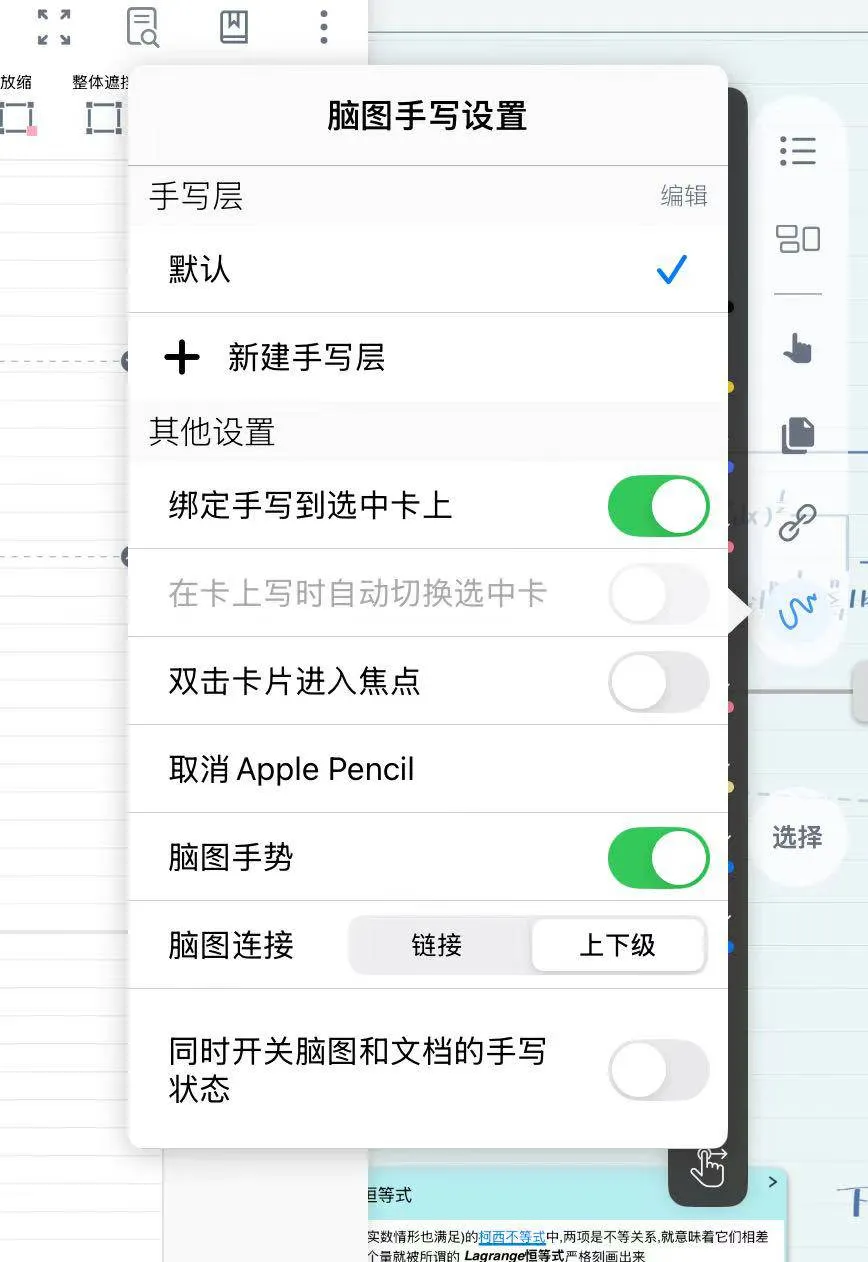
Mind Map Handwriting Settings
Mind map handwriting tool
- Tap the handwriting tool in the mind map sidebar (shown above) to write freely in the mind map. You can also bind handwriting to cards for easier viewing and reorganizing. For more usage, see: Mind Map Handwriting Sync Binding
- Double-click the
mind map handwriting toolto change its settings -
Mind Map Gesture
When you turn on the
Mind Map Gestureswitch, your handwriting can be recognized as mind map commands, such as creating and deleting card links and card hierarchy, or selecting cards. For details, see: Card Links ③: Hand-Drawn Curve Links
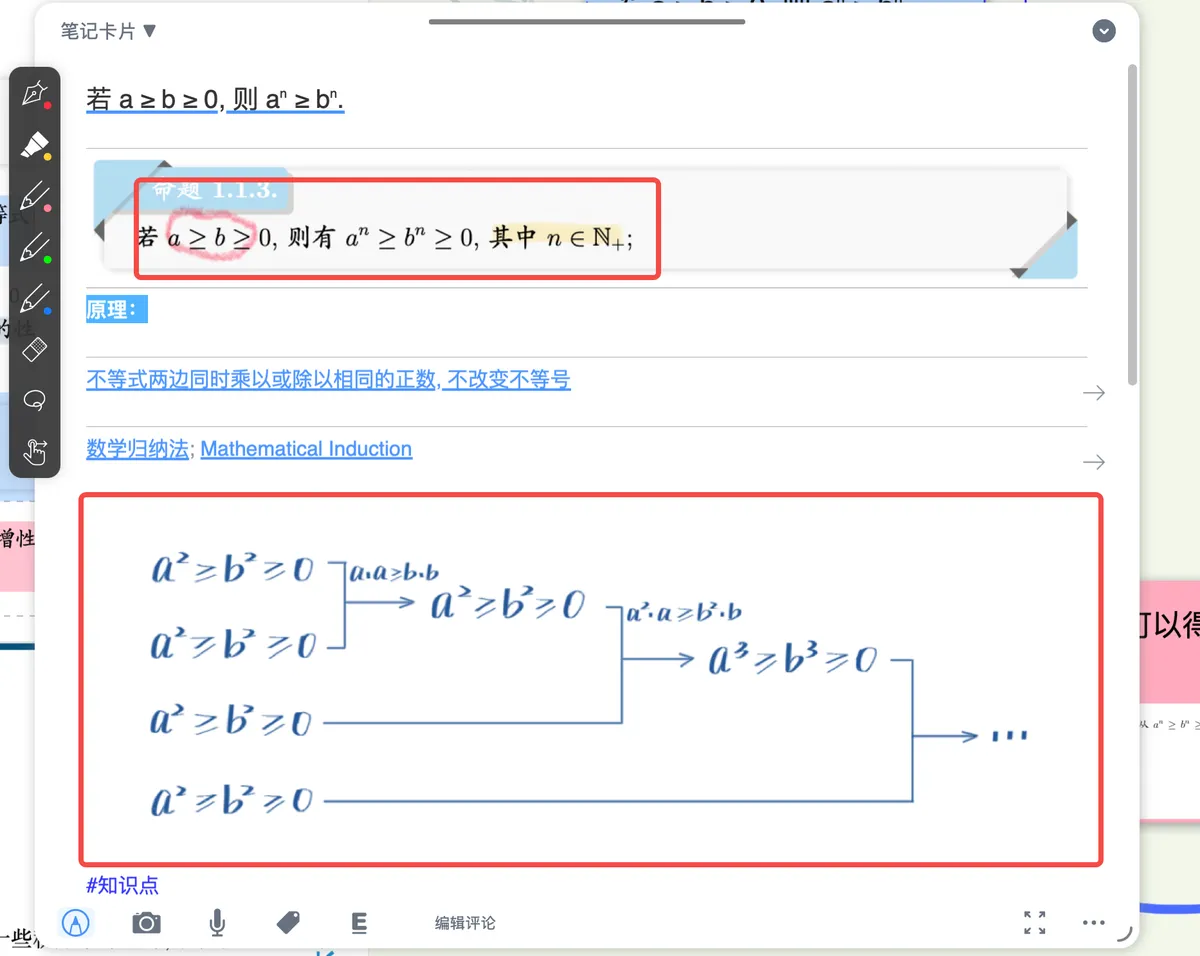
Card Handwriting Settings
Card handwriting tool
- Tap the pen-type icon in the
card editor(shown above) - Choose a pen type from the
handwriting toolbar, and you can write freely in the card's image and comment area
- Write directly on the card's own image
💡Use cases:
Draw directly on image excerpts such as formulas and charts to mark the key parts
Use the highlighter to highlight exam points on image excerpts, then review them in recall mode. For details, see: Document Review: Cloze Deletion & Recall Mode
- Write in the card's comments
💡Use cases
Break down the card's structure in the comment area to internalize knowledge
Use it as scratch paper and an answer sheet for question cards, writing freely in the infinitely expandable comment area
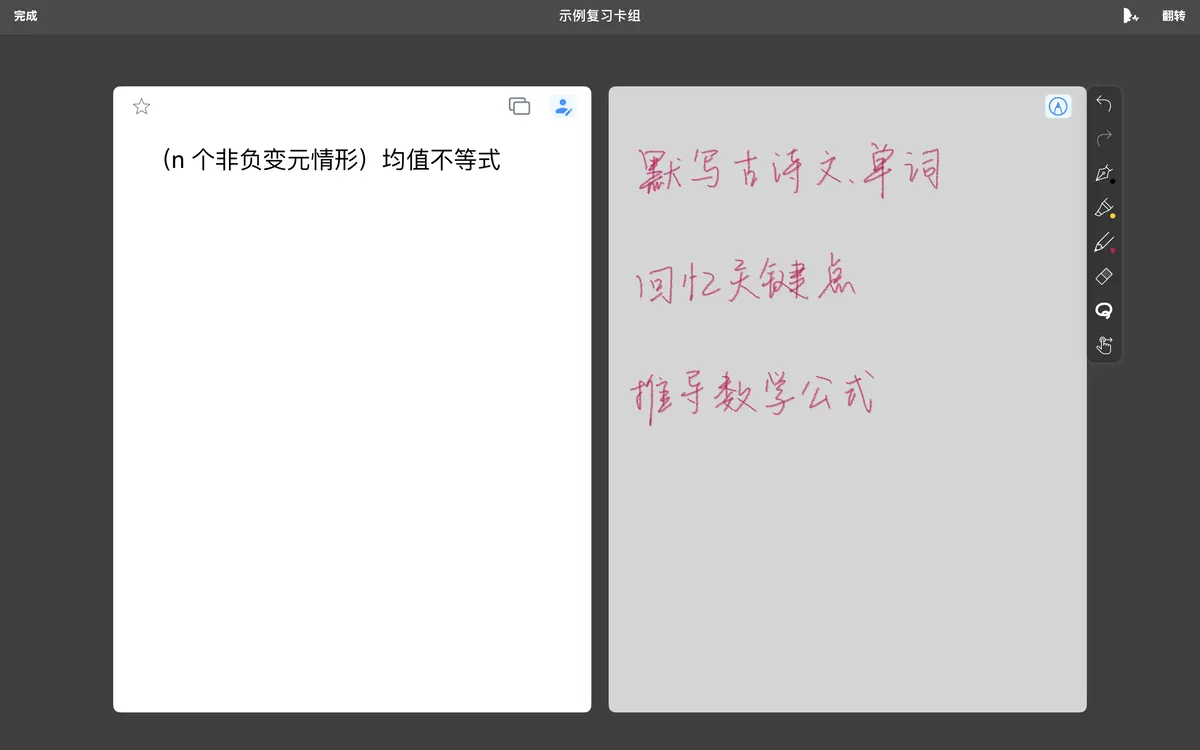
Handwriting in Review
💡You can use handwriting within annotations for activities such as writing from memory and working through calculations
Annotate
Card handwriting tool
- Enter review mode and tap the
Annotatebutton to open the annotation panel on the right; tap the handwriting tool in the annotation panel to write in it
For more usage, see: Annotation
2. The Handwriting Toolbar
After you enable handwriting mode in a document, mind map, card, or review scenario, the handwriting toolbar pops up automatically, supporting custom configuration and operations.
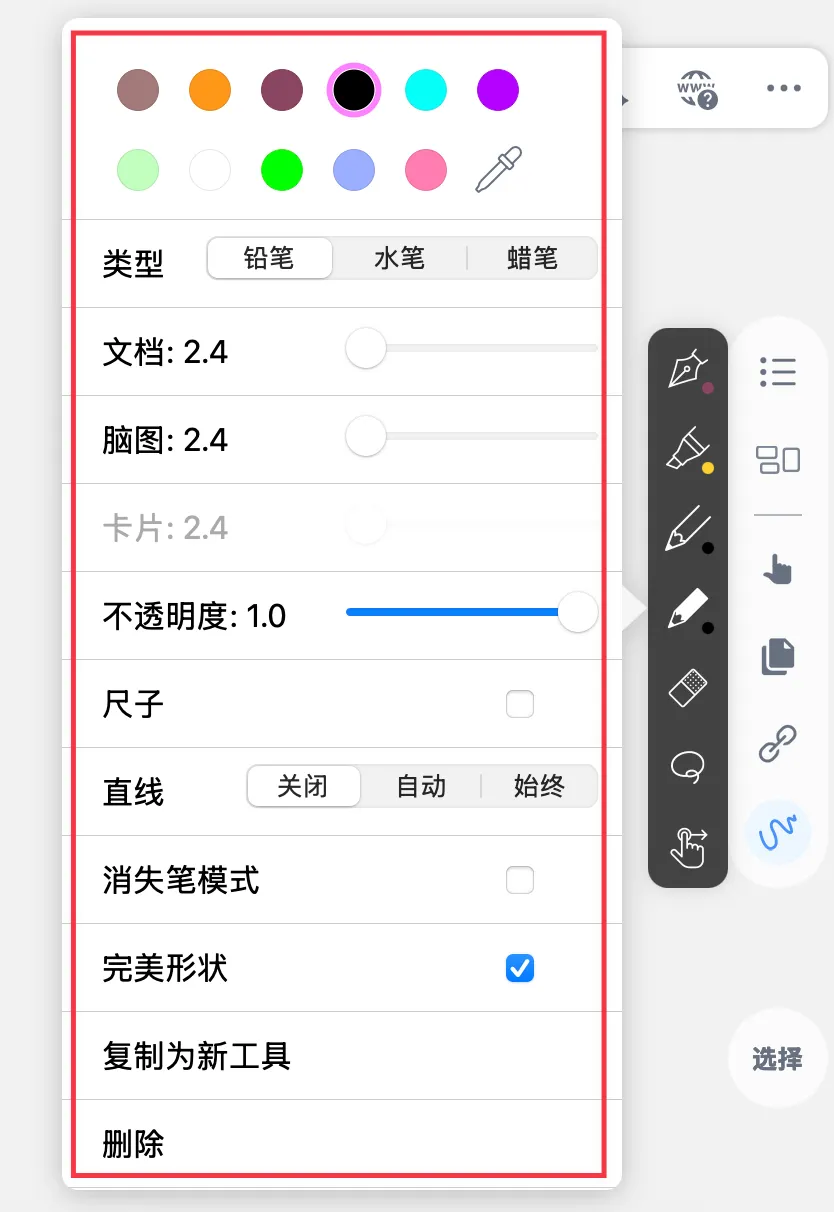
- Tap different icons on the
handwriting toolbarto switch between pen modes - Tap an icon again to open the handwriting customization popup, where you can change the pen's color, type, thickness, opacity, and more
2.1. Moving the Handwriting Toolbar


You can drag the handwriting toolbar to a convenient spot. It snaps automatically to the edge of the screen, a document, or a card, as shown:
💡If the handwriting toolbar has too many pens, it may not be able to snap to the top, because space there is limited
2.2. Pen Tools
2.2.1. Changing the Pen Type
- Tap a different pen-shaped icon to switch pen tools
- The icon of the currently selected pen turns white
- Pen: includes three types —
Normal,Mono, andFountain— suitable for writing text (e.g., annotations, problem-solving steps)
Pen icon
- Highlighter: suitable for highlighting (e.g., marking key sentences in the literature, exam points)
Highlighter icon
- Pencil: includes three types —
Pencil,Water, andCrayon— suitable for drawing and coloring (e.g., drawing medical diagrams, filling in bar charts)
Pencil icon
2.2.2. Switching Colors
- After tapping a pen tool, you'll see the color bar at the top of the handwriting customization popup, made up of 11 color icons and one color-picker icon
- Tap a color icon to change the pen's color.
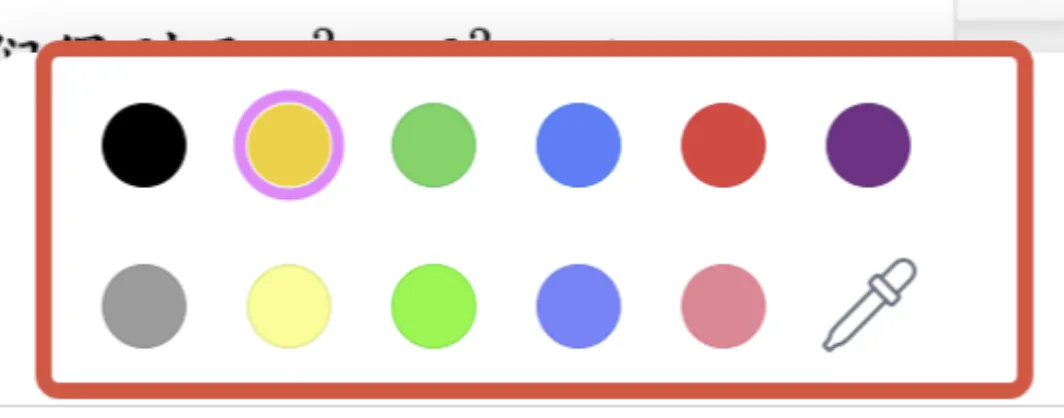
2.2.3. Customizing the Color Bar
Color picker

Tap the color picker (shown by the icon above) to customize a color. You can also import a style to reuse a ready-made color palette with one tap.
Method 1: Change via RGB values and Hex codes
Tap the color-picker icon to open the color configuration popup. Enter a value from 0-255 in each of the R/G/B fields, or enter "# + six-digit code" in the HEX field (e.g., #FF0000), to customize the color.

Method 2: Pick a color from the color disc
💡When you're not sure of the exact RGB values you want, you can pick a color directly from the color disc.
-
The color configuration popup contains a color display area and two color discs:
- Color display area: the first two cells are pure white / pure black, the third cell is the original color, and the fourth cell is the adjusted new color;
- Color discs: the upper disc adjusts brightness and saturation, and the lower disc adjusts hue;
-
How to use: tap a disc to pick a color, or slide your pen tip to adjust in real time; compare with the original color and release to confirm
2.2.4. Changing Pen Thickness

The thickness adjustment bar in the handwriting customization popup is divided into three scenarios — Document, Mind Map, and Card — and each one lets you adjust line thickness via a slider (default) or in steps.
💡Note that you can only adjust thickness when handwriting mode is enabled for the mind map, document, or card; otherwise the control appears grayed out.

💡How to switch handwriting thickness adjustment to stepped adjustment:
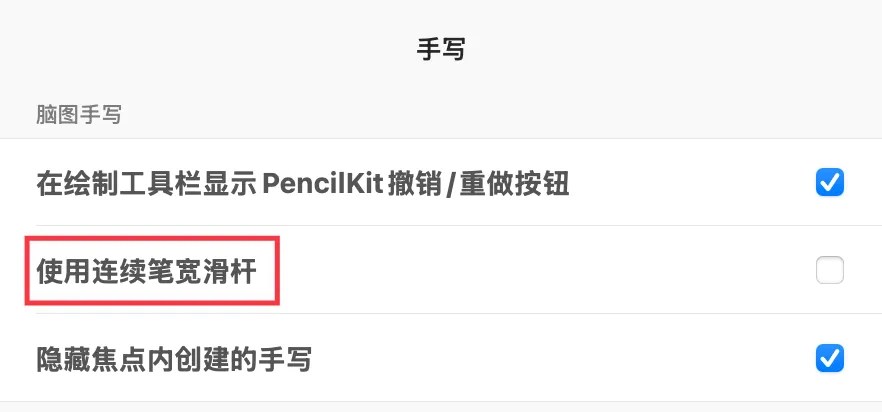
MN Settings → Handwriting → turn off
Use Continuous Pen-Width Slider
💡Use case:
For example, use a thin pen (matching the text size) to annotate in a document, and a thick pen (for emphasis) to mark core concepts in a mind map — without switching pen tools, just adjust by scenario category.
Official recommended brush parameters:
2.2.5. Changing Opacity
Drag the Opacity slider to adjust across 10 steps.
2.2.6. Duplicating and Deleting Pens
💡When you add a new pen, you may just want a different color:
MN4 lets you duplicate a pen tool directly, so parameters you've already set (such as thickness and opacity) don't need to be configured again
You can configure the handwriting toolbar faster by duplicating and deleting pens.
In the current version, the handwriting toolbar can hold at most 12 brushes and at least 3 brushes (one Pen, one Highlighter, and one Pencil)
💡Max users can configure up to 12 brushes; Pro users can configure up to 8 brushes
2.2.6.1. Duplicating a Pen

- Select a pen tool and tap it again to bring up the handwriting customization popup, then tap
Clone As New Tool; the new tool has exactly the same configuration as the original. - Tap the new brush tool again to change parameters such as
color, thickness, and opacity
2.2.6.2. Deleting a Pen
Tap the pen tool you want to delete, tap it again to bring up the handwriting customization popup, then tap Delete; the pen is removed from the toolbar
💡Deleting a pen tool cannot be undone, so proceed with caution
2.3. Auxiliary Tools
2.3.1. Ruler
- Select a pen tool and tap it again to see the
Rulerswitch in the handwriting customization popup - Turn on the switch to summon the ruler tool in that module (mind map, document, or card)
2.3.1.1. Adjusting the Ruler's Position and Angle
- Tap the
Rulerand drag to move it to where you want - Press the
Rulerwith two fingers and rotate to adjust its angle.
💡If the ruler is enabled in the mind map, document, and card, you can adjust each one separately.

If tapping does nothing, first make a stroke in that area with your pen so that MN recognizes which ruler tool you're currently using
2.3.1.2. The Ruler and Writing
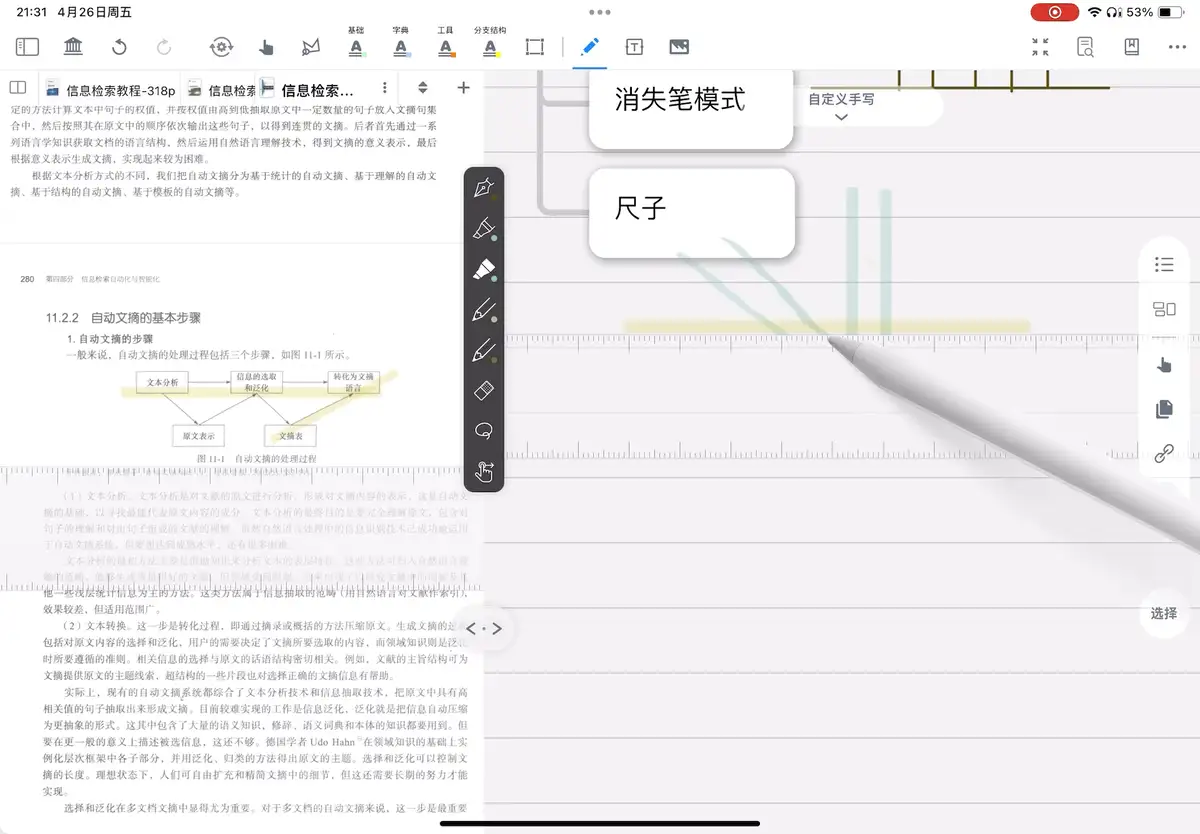
Draw along the ruler with your pen tip and a straight line is generated automatically, showing the value at the pen tip's position.
💡When the pen tip doesn't write along the ruler, no straight line is generated automatically.
The ruler can also act as a cover, as shown:

2.3.2. Straight Line



Select a pen tool and tap it again to see the straight-line bar in the handwriting customization popup, which offers three states: Off, Auto, and Always.
| State | Effect | Use case |
|---|---|---|
| 🖼️ Image | Does not convert to straight lines | Handwritten note text, drawing curves |
| 🖼️ Image | Strokes that are fairly close to straight can be converted into straight lines | For frequent switching between handwriting and drawing lines (e.g., making tables) |
| 🖼️ Image | Converts everything to straight lines | Drawing tables, linking cards |
2.3.3. Vanish Mode
- Select a pen tool and tap it again to see the
Vanish Modeswitch in the handwriting customization popup - Once enabled, handwriting strokes disappear automatically after a 1-second pause.
💡Works well with presentation mode for explaining concepts, recording lessons, and more.
2.3.4. Perfect Shape
- Select a pen tool and tap it again to see the
Perfect Shapeswitch in the handwriting customization popup. - Turn on the switch to enable
Perfect Shapemode
Now, after you draw a shape such as a circle, ellipse, rectangle, pentagon, star, or heart and hold the pen tip still, the strokes automatically turn into a perfect shape
💡After enabling Perfect Shape, you can also use the scribble-erase feature
2.4. Eraser Tool
2.4.1. Eraser Settings
Eraser
After opening the handwriting toolbar, select the eraser tool (shown above) to erase handwriting strokes with the Eraser
Tap the Eraser tool again to bring up the eraser settings popup


- Complete Erase vs. Incomplete Erase
💡When erasing with the eraser tool, sometimes you need to erase an entire stroke, such as when deleting large sections of notes.
Other times you only need to erase part of a stroke, such as when modifying a drawing.
In the eraser settings popup, set the Eraser state to Complete, and the eraser will erase every part of any stroke it touches.
Switch the Eraser type to Incomplete, and the eraser will only erase the pixels it actually touches.

- Auto-cancel
In the eraser settings popup, turn on the Auto-cancel switch, and after you erase once with the Eraser, it will automatically cancel the eraser tool and switch back to the last pen tool you used.
💡With Auto-cancel on, as soon as you stop erasing, the eraser immediately turns back into the handwriting tool you were using, simplifying the workflow to "select the eraser tool → erase a part → keep writing" and avoiding the hassle of picking the wrong tool when manually switching back
2.4.2. Scribble Erase
You can erase with just the pen, without switching to the eraser:
Step 1: Turn on Perfect Shape for any pen
Step 2: Scribble over your notes with that pen, then hold the pen tip on the screen for about 0.5 seconds to erase the handwriting strokes
For a demonstration of the exact effect, see:
2.5. Lasso Tool
Lasso
After opening the handwriting toolbar, select the lasso tool (shown above). Circle handwriting strokes with the lasso, and they become selected and appear inside a blue box, while a black lasso pop-up menu appears, supporting operations such as color adjustment, cut, copy, convert to text, and delete.
2.5.1. Moving and Resizing Selected Strokes
- Using a pen or finger, tap the triangle icon in the bottom-right corner of the blue box and drag to resize the strokes.
- Using a pen or finger, drag the selected strokes to change their position
💡Long-press and drag the selected strokes to copy strokes from a document to a mind map, and vice versa

2.5.2. Changing the Color of Selected Strokes

Tap the color option in the lasso pop-up menu to bring up the color bar, then tap a color icon to change all selected strokes to that color.
2.5.3. Cutting, Copying, and Deleting Strokes
Tap the cut option in the lasso pop-up menu to paste the strokes elsewhere in a mind map, document, or card
2.5.4. Converting Strokes to Text
For details, see: AI One-Tap Conversion of Handwriting to Markdown Text
2.5.5. Create Card and Bind to Card
In the lasso pop-up menu within a mind map, there are Create Card and Bind to Card options.
Create Card: the selected strokes become a new card created in the mind map;
Bind to Card: add the strokes to a card as one of its comments; see Mind Map Handwriting Sync Binding for details.
2.6. Toggle Touch
Touch icon
After opening the handwriting toolbar, select the touch tool (shown above). The Apple Pencil will then take over from your finger for actions such as excerpting, turning pages, and dragging cards, without producing any strokes.
💡When frequently switching between actions like writing and excerpting, you can use this tool to reduce switching between functions
3. Sketch Layers
Sketch layers are the "layers" of documents and mind maps. You can write on different "layers," and they support operations such as stacking multiple layers and switching between them. Both documents and mind maps have the sketch layer feature, and they work in similar ways.
💡The
sketch layerfeature makes MarginNote more efficient and convenient for drilling problems, reviewing, and organizing notes. It removes any limit on how many times you can redo problems: you can create multiple sketch layers to practice repeatedly, and the layer-stacking concept makes side-by-side comparison more efficient, helping you summarize and review.For example, when drilling problems for review, you can create a new layer for each round and name it with the date, such as "Functions round1". You can also hide past strokes to focus on the current round, or stack different sketch layers semi-transparently to compare differences in problem-solving approaches.
- Creating a Sketch Layer:
When no sketch layer has been added, your handwriting is bound to the "Default" layer. Tap the "+" icon to bring up the sketch layer naming popup.
By default, sketch layers are named "Practice Sheet 1, Practice Sheet 2……"
- Other Sketch Layer Operations:
On the handwriting settings page, tap "Edit" in the top-right corner to enter the sketch layer editing page:
- Tap the "..." icon to the right of a sketch layer, then tap
Deleteto delete that sketch layer
⚠️Once you choose to delete, the handwriting in that sketch layer, any bound text boxes, and so on will all disappear, and the undo action will not work, so proceed with caution.
For more settings, see: Layers: Document Notebooks & Sketch Layers